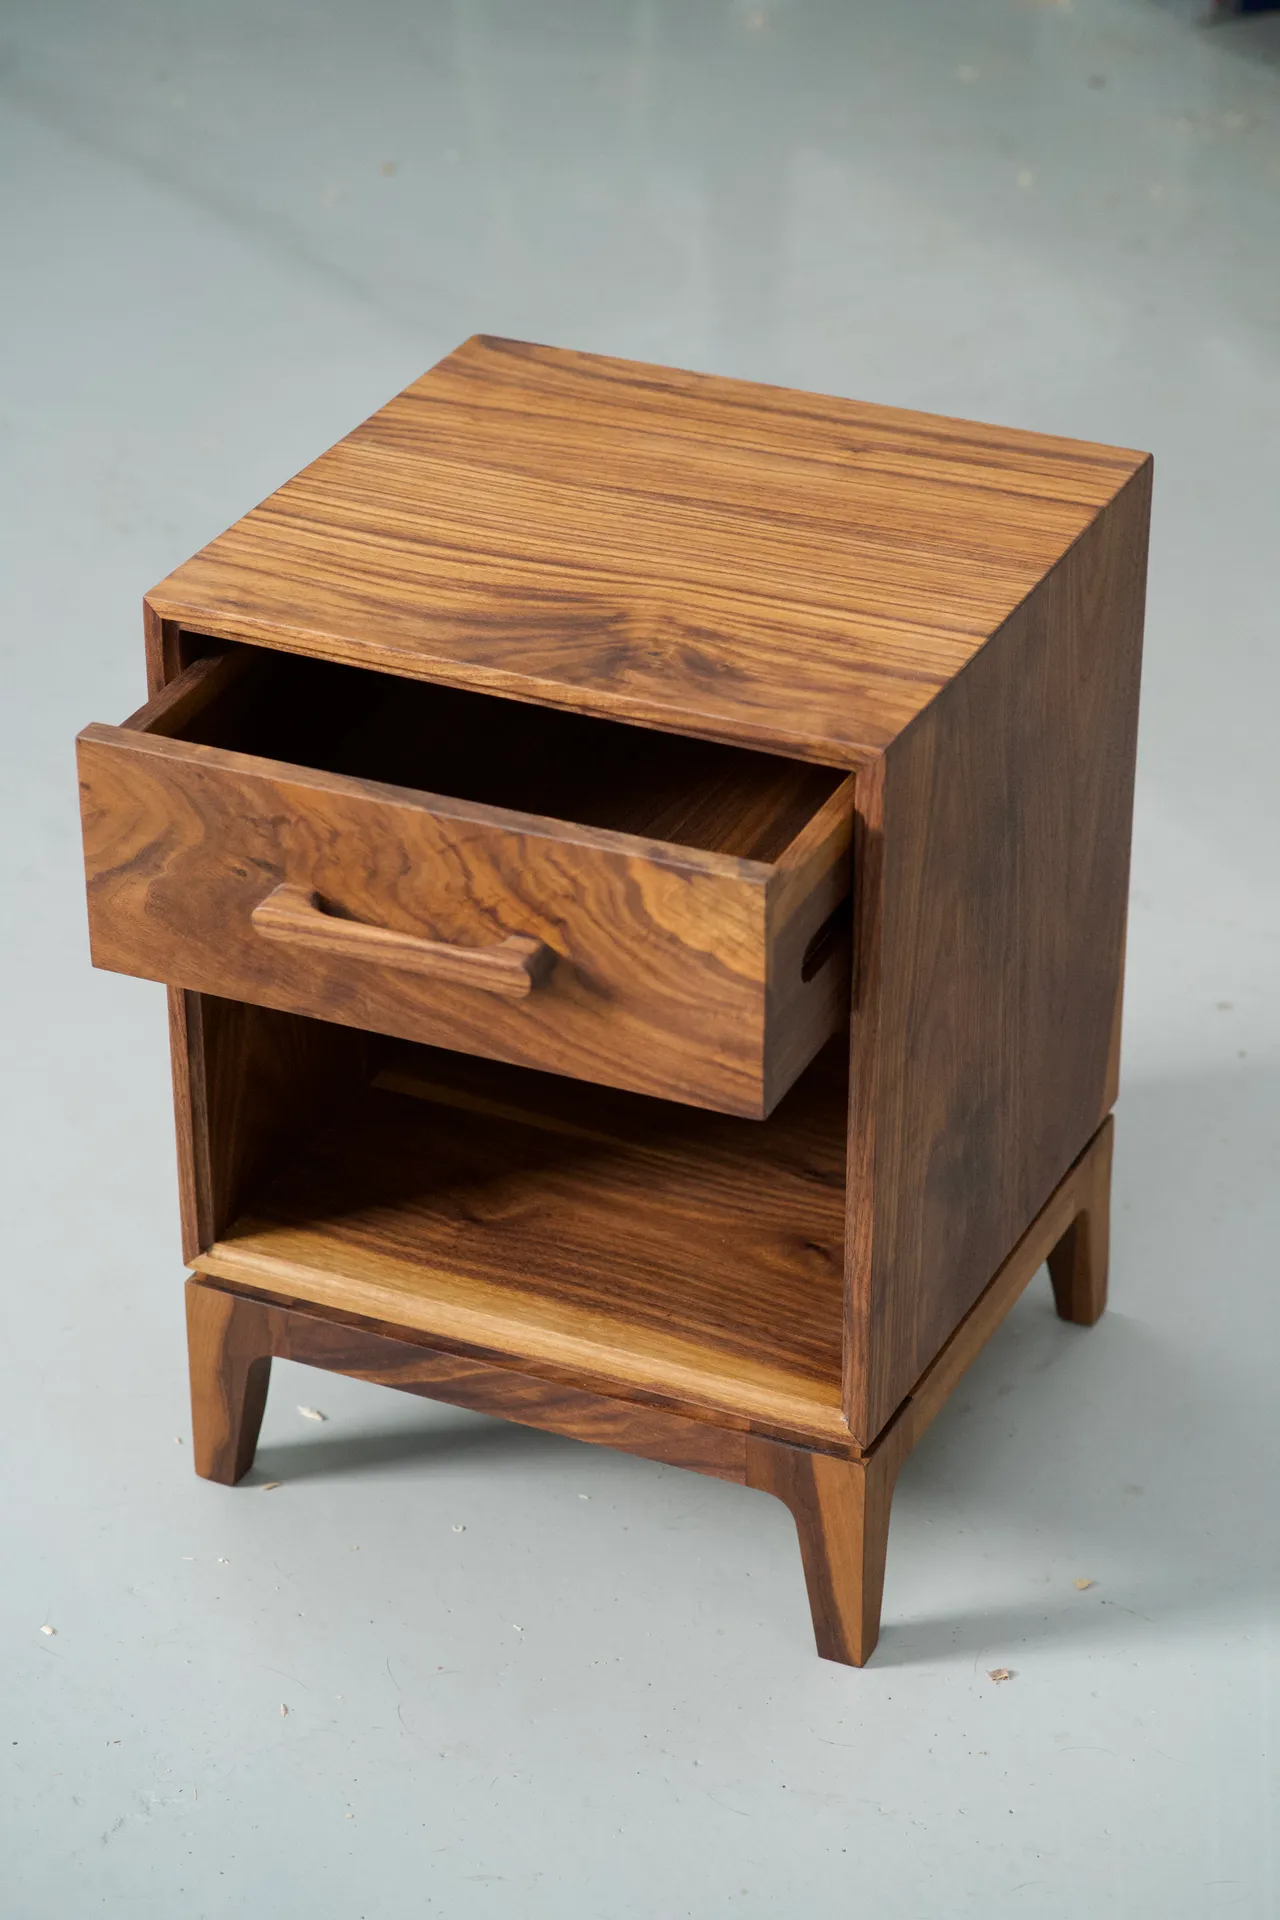
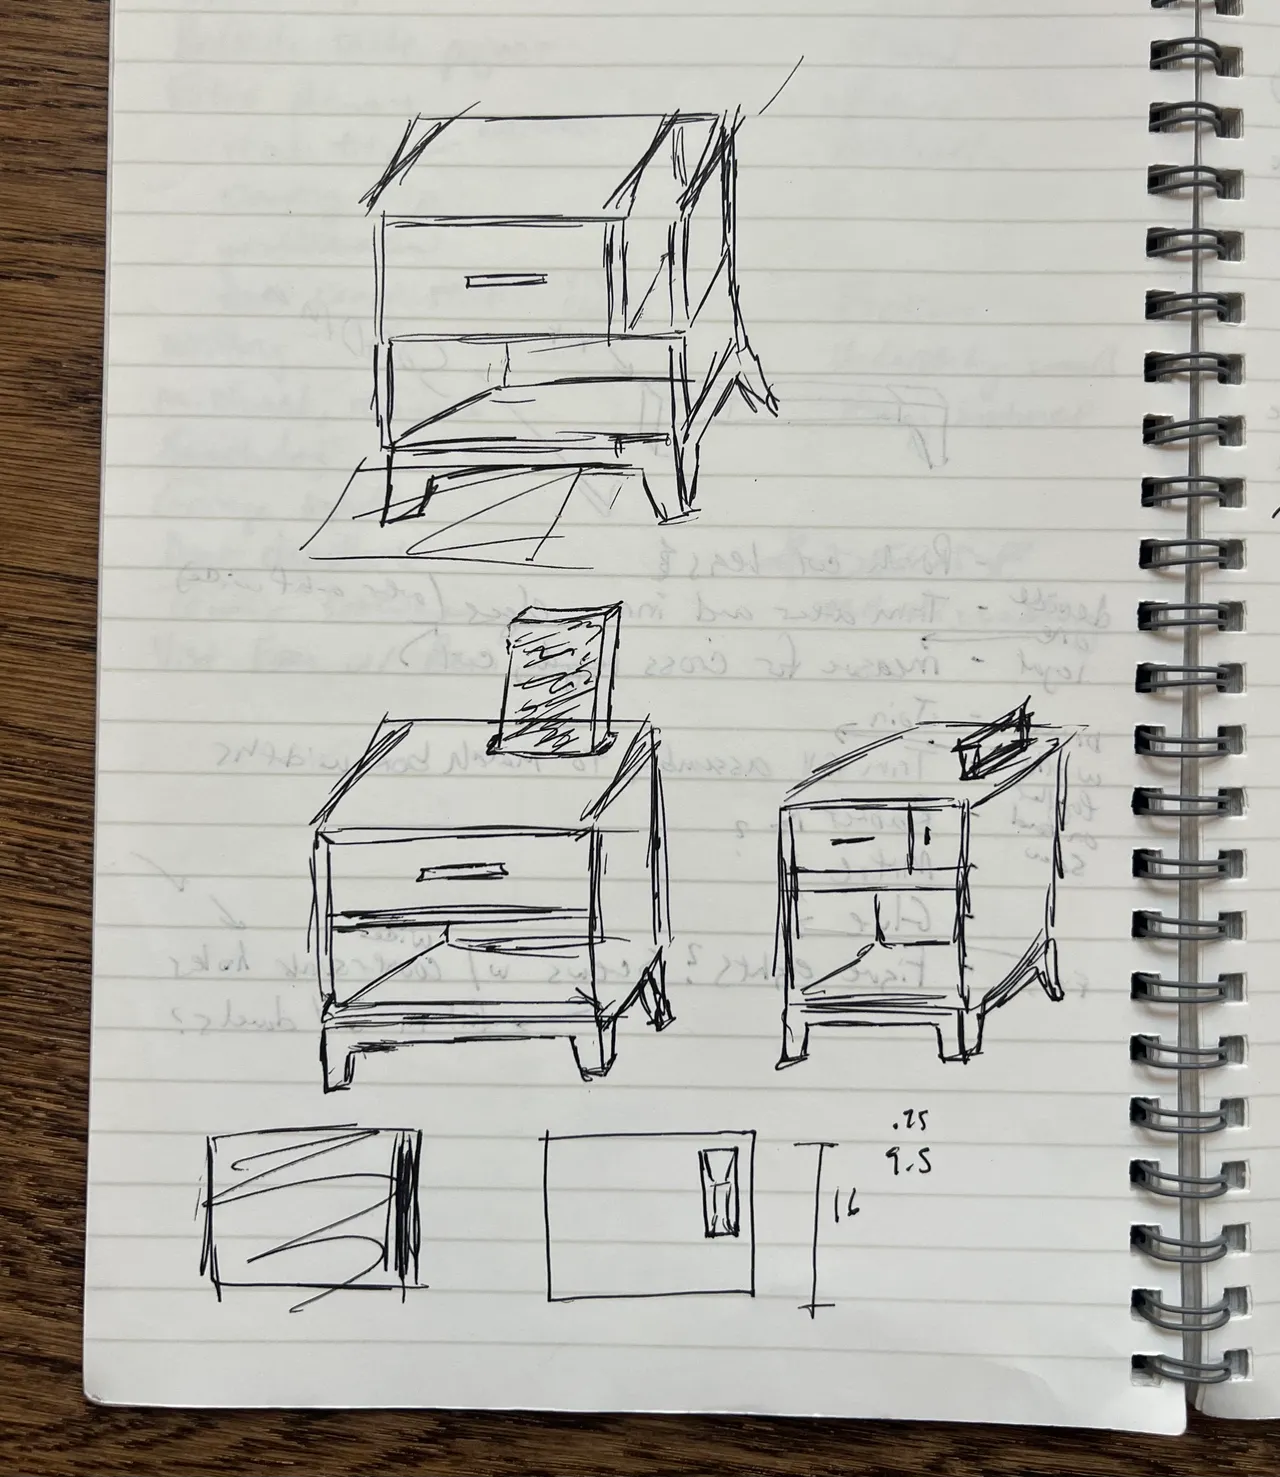
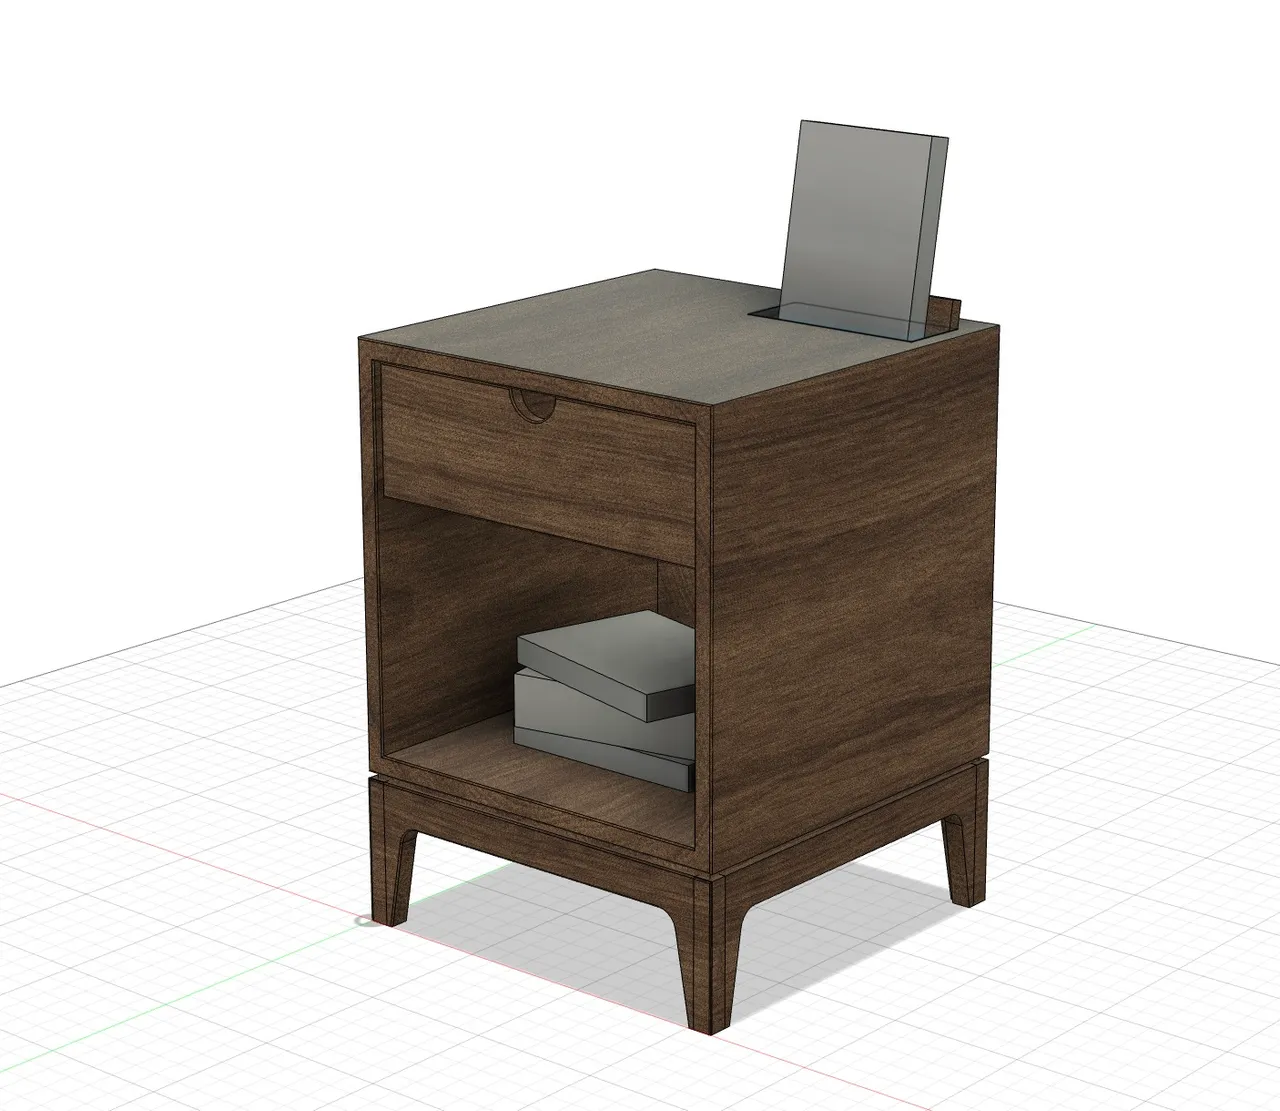
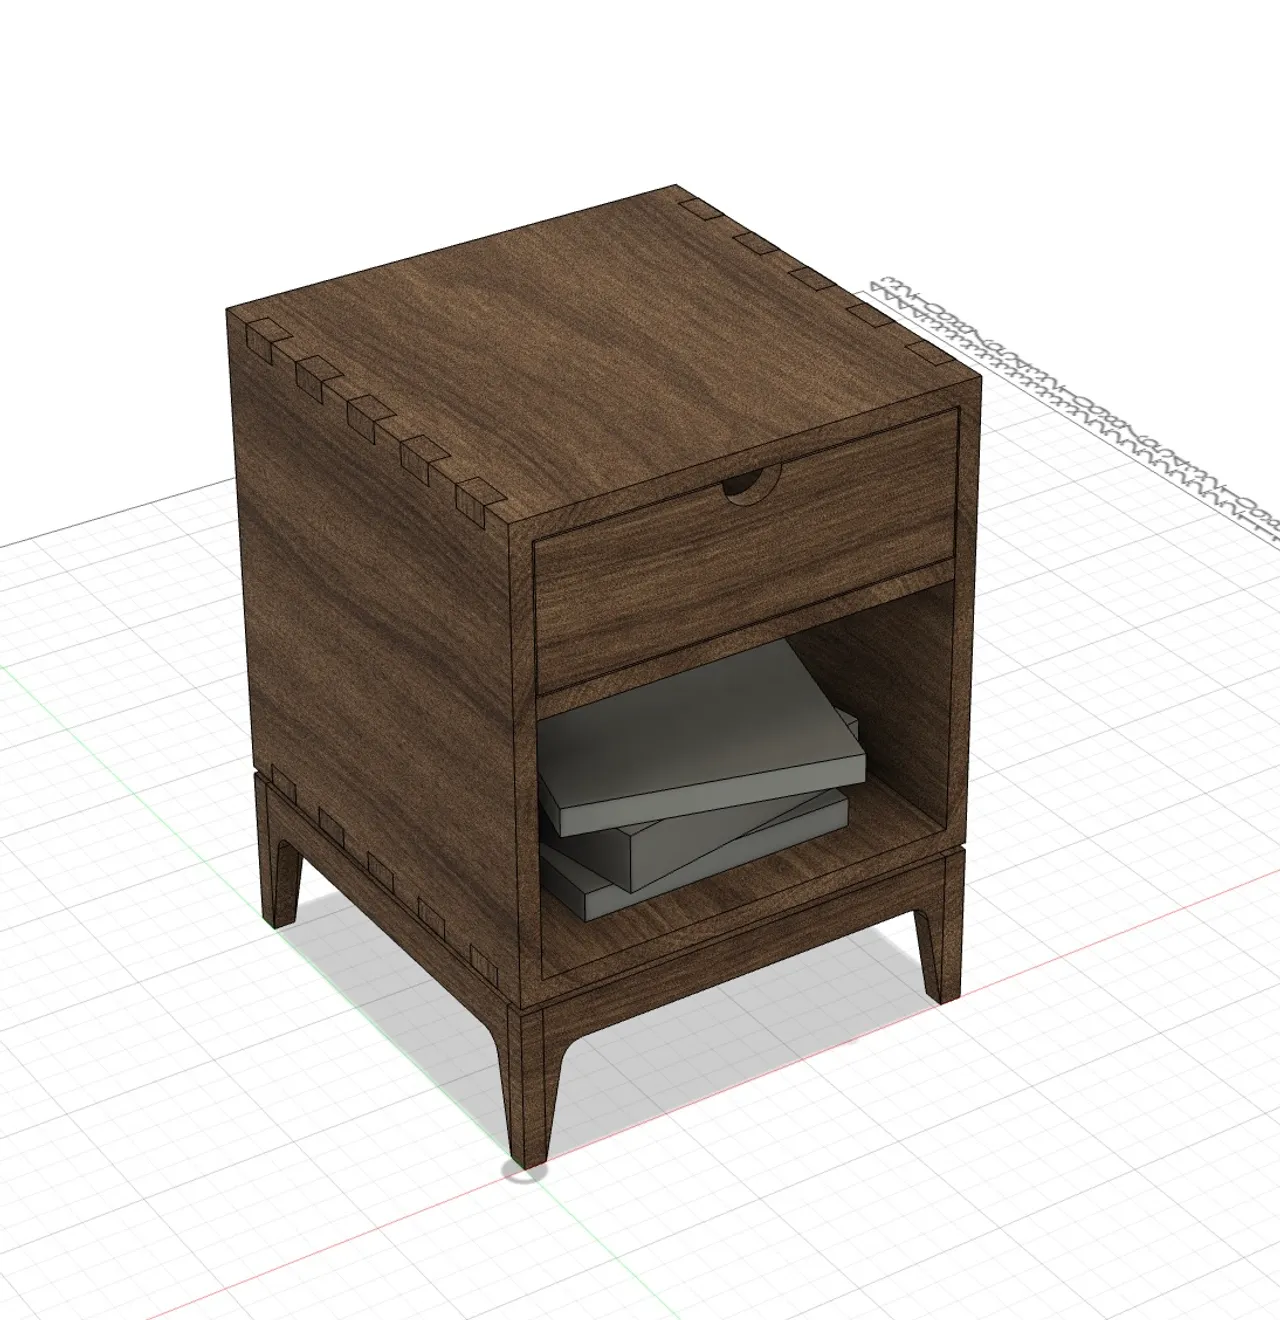
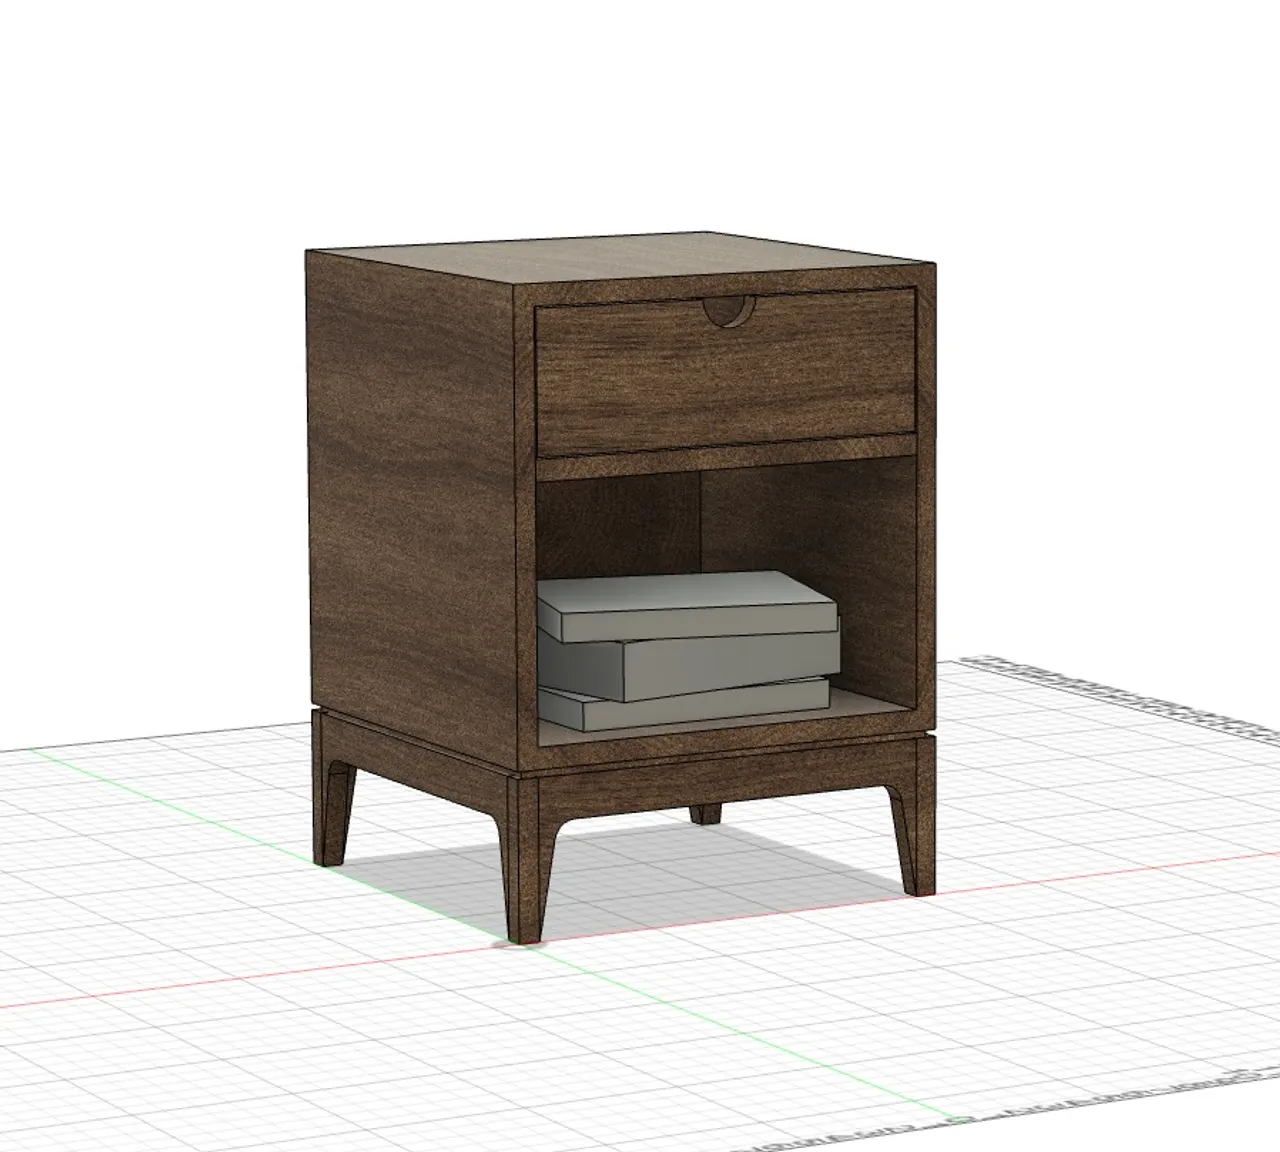
Side table for Avi & Hannah
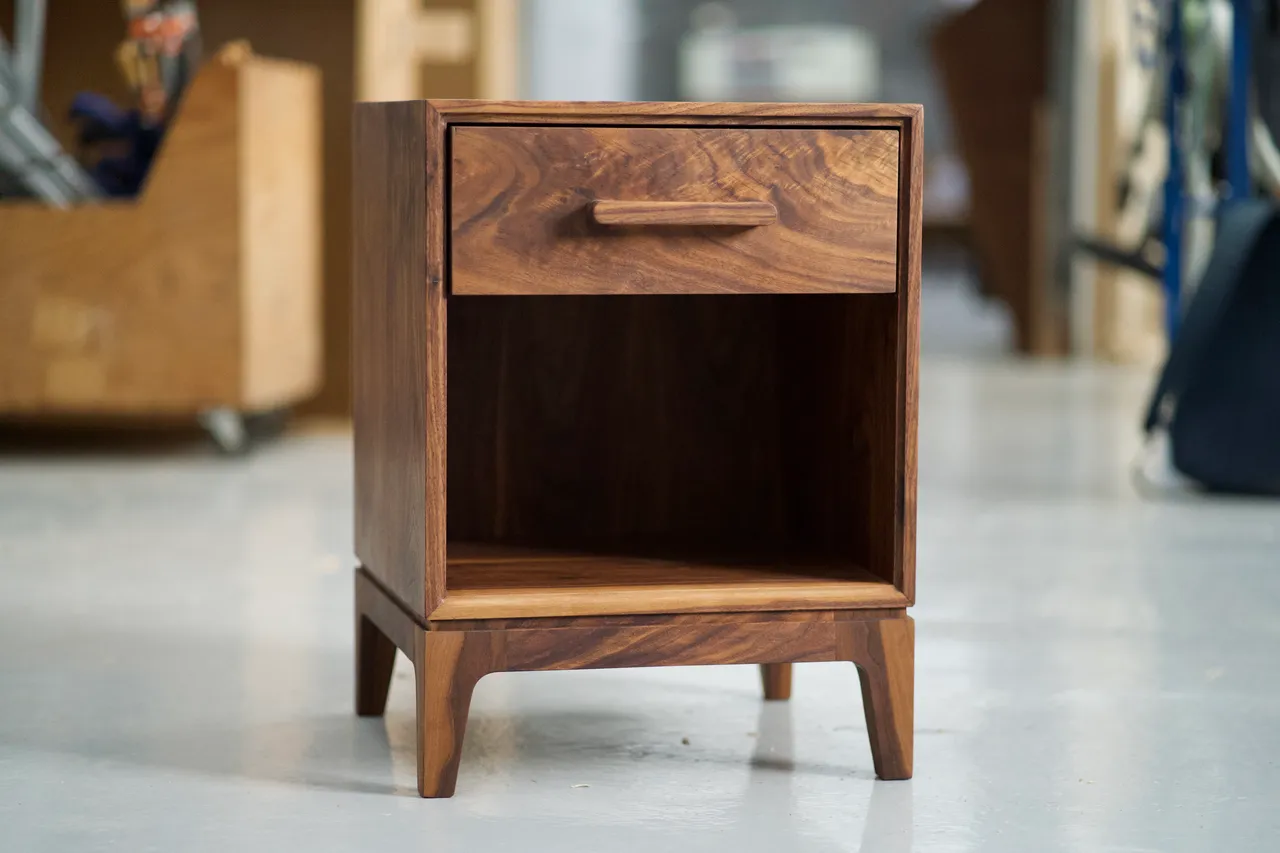
I had some extra walnut after making a coffee table (Coffee table for Avi & Hannah), so I decided to make a complimentary side table. I went through many waves of motivation during this project, mostly because I was unexcited about making a box. But, in the end, I focused on details I'm now quite proud of, like the wood selection and placement, subtle profiles, and custom drawer pull.
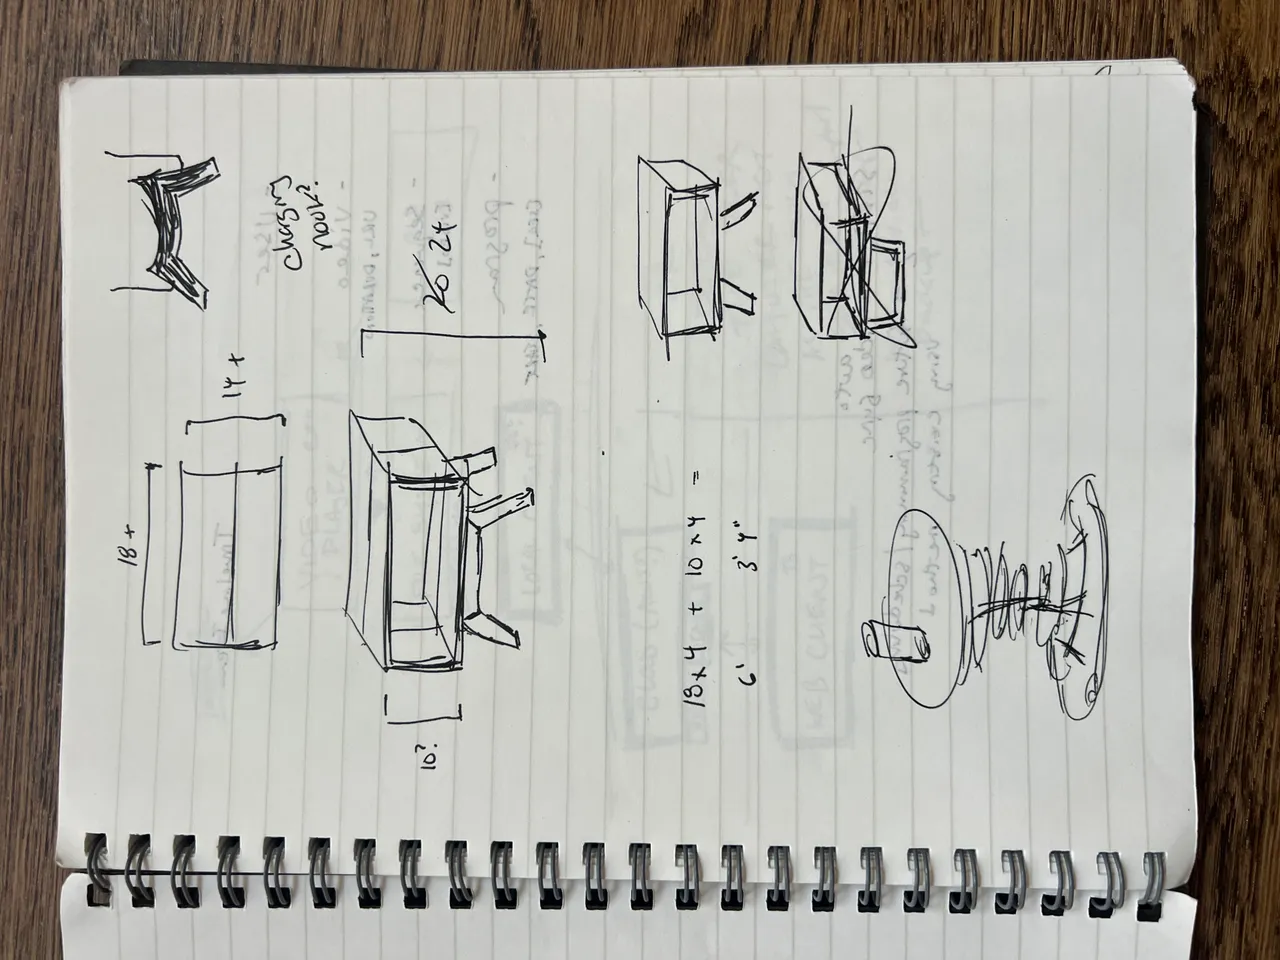
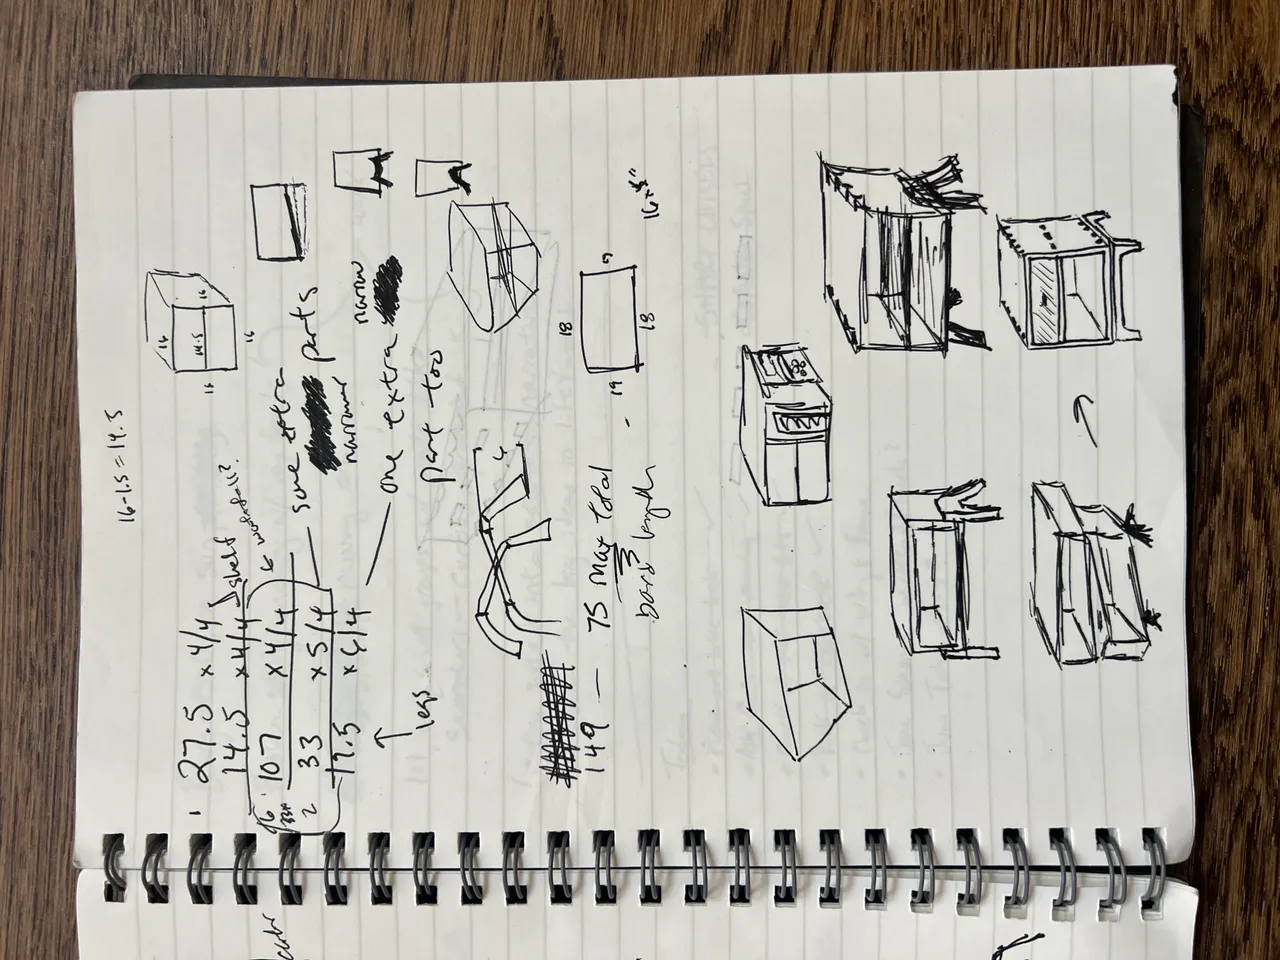
Design
I started out with some wacky designs (which I call the "slinky table"), but I began to get itchy and ultimately settled on something simple I could start building right away. I do intend to make a slinky table at some point, though.

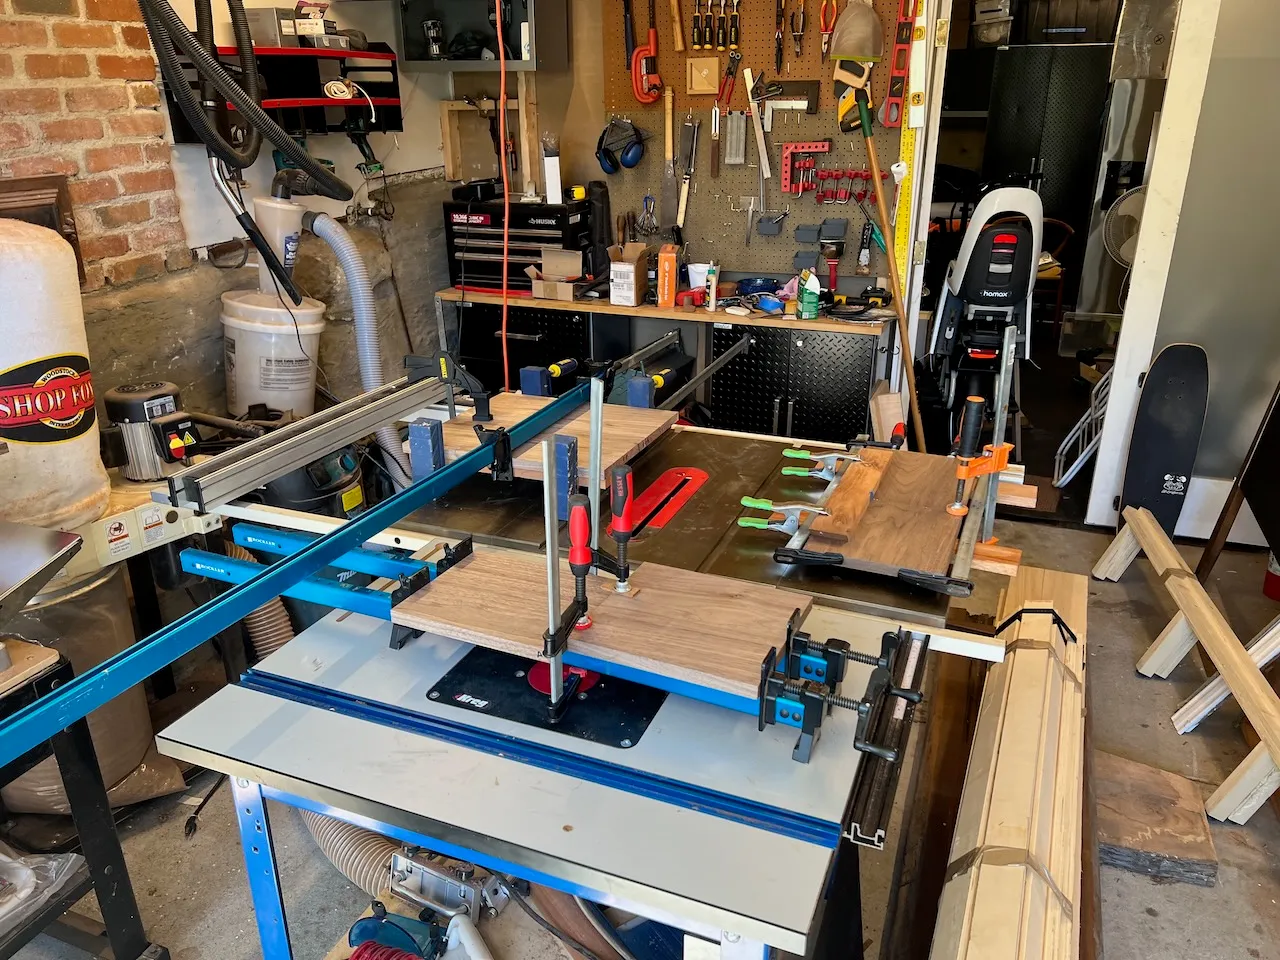
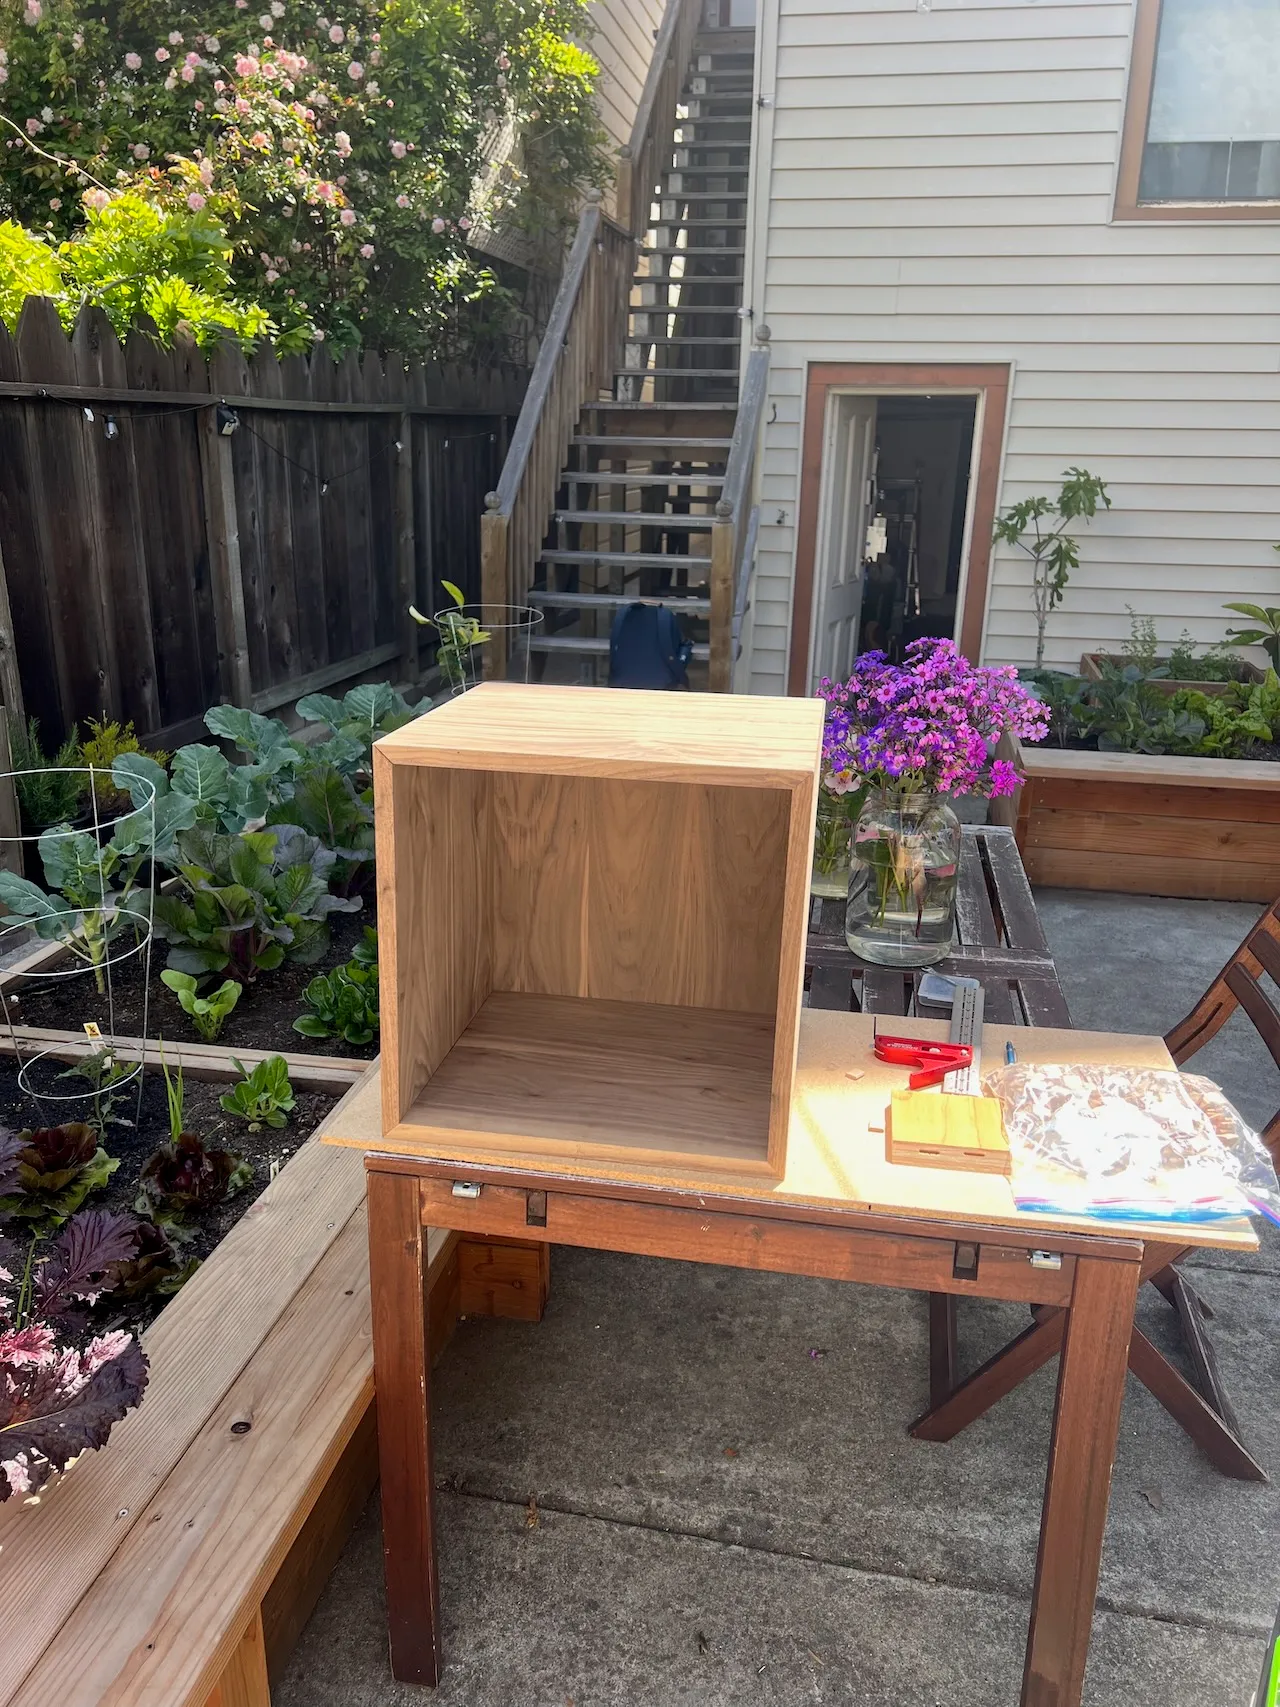
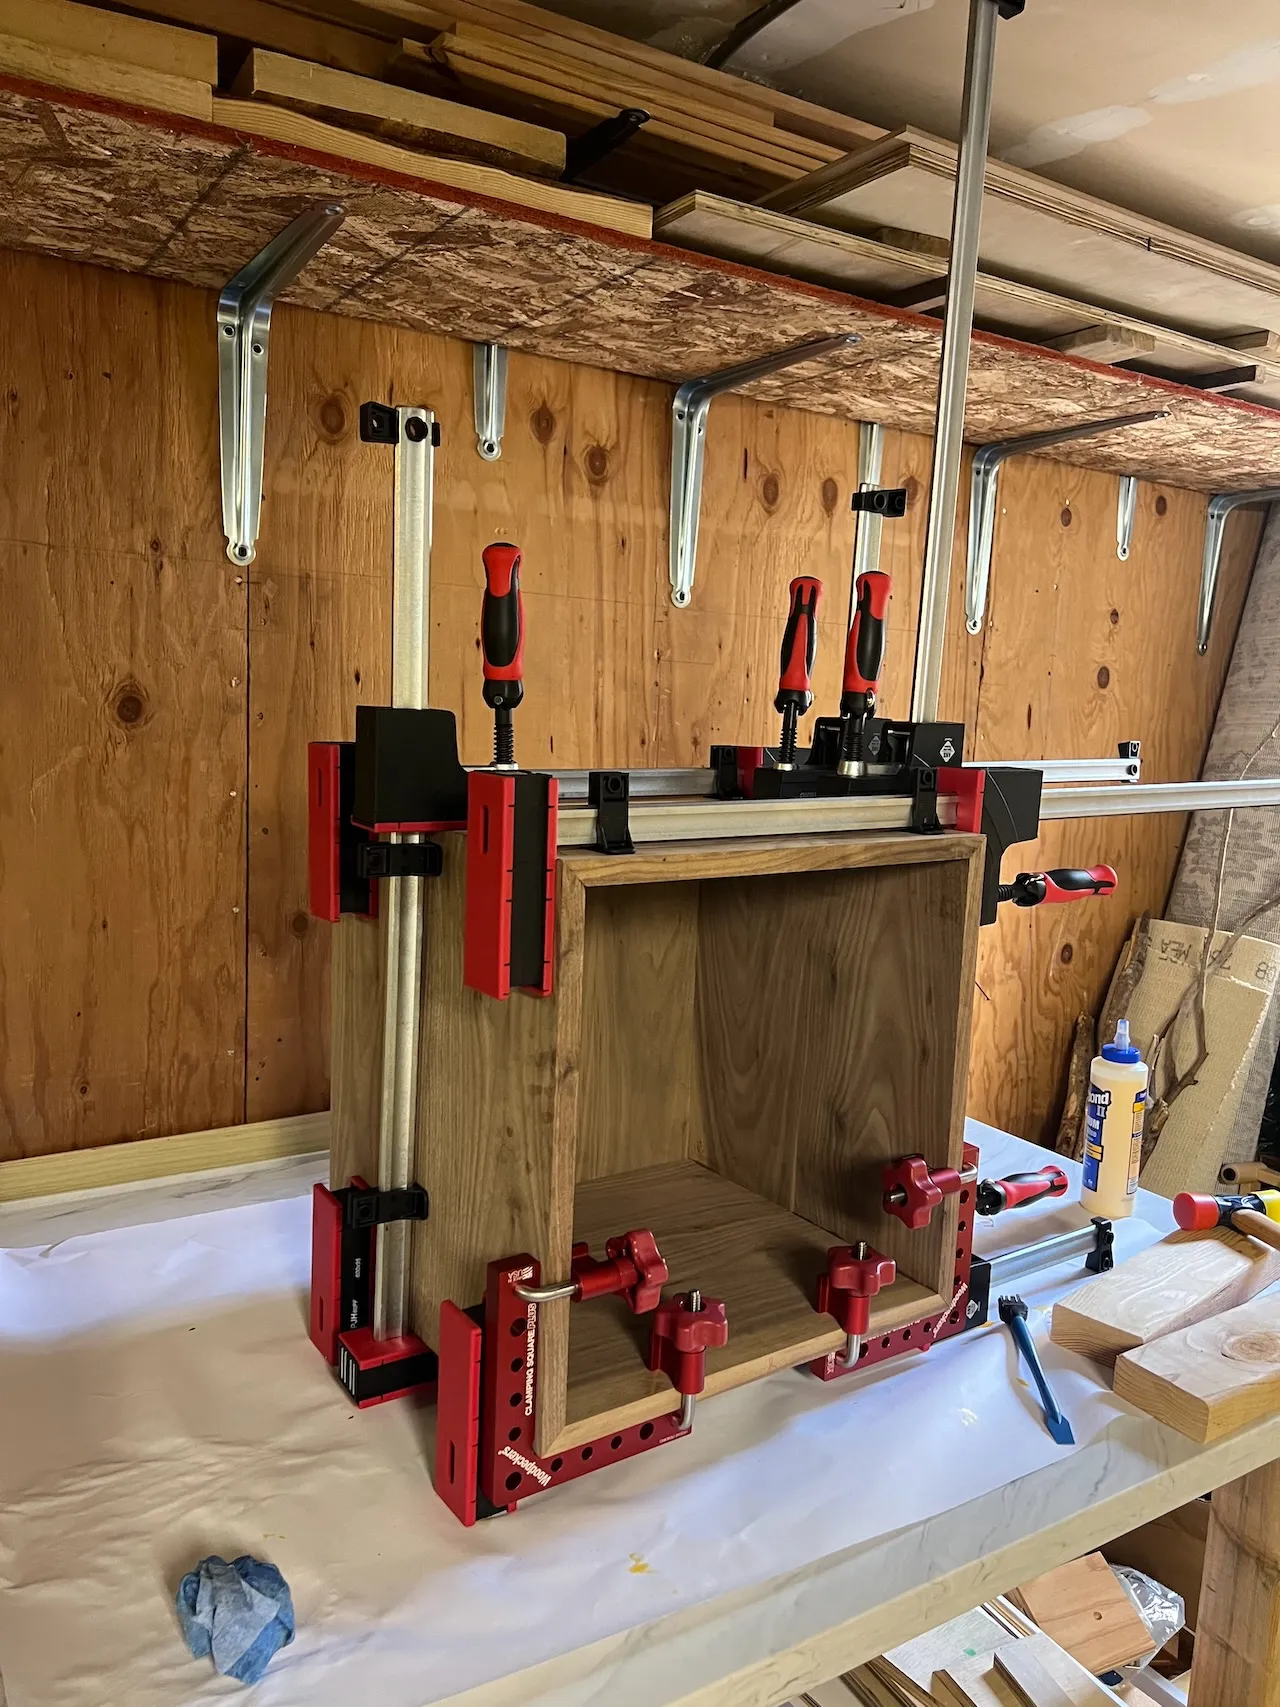
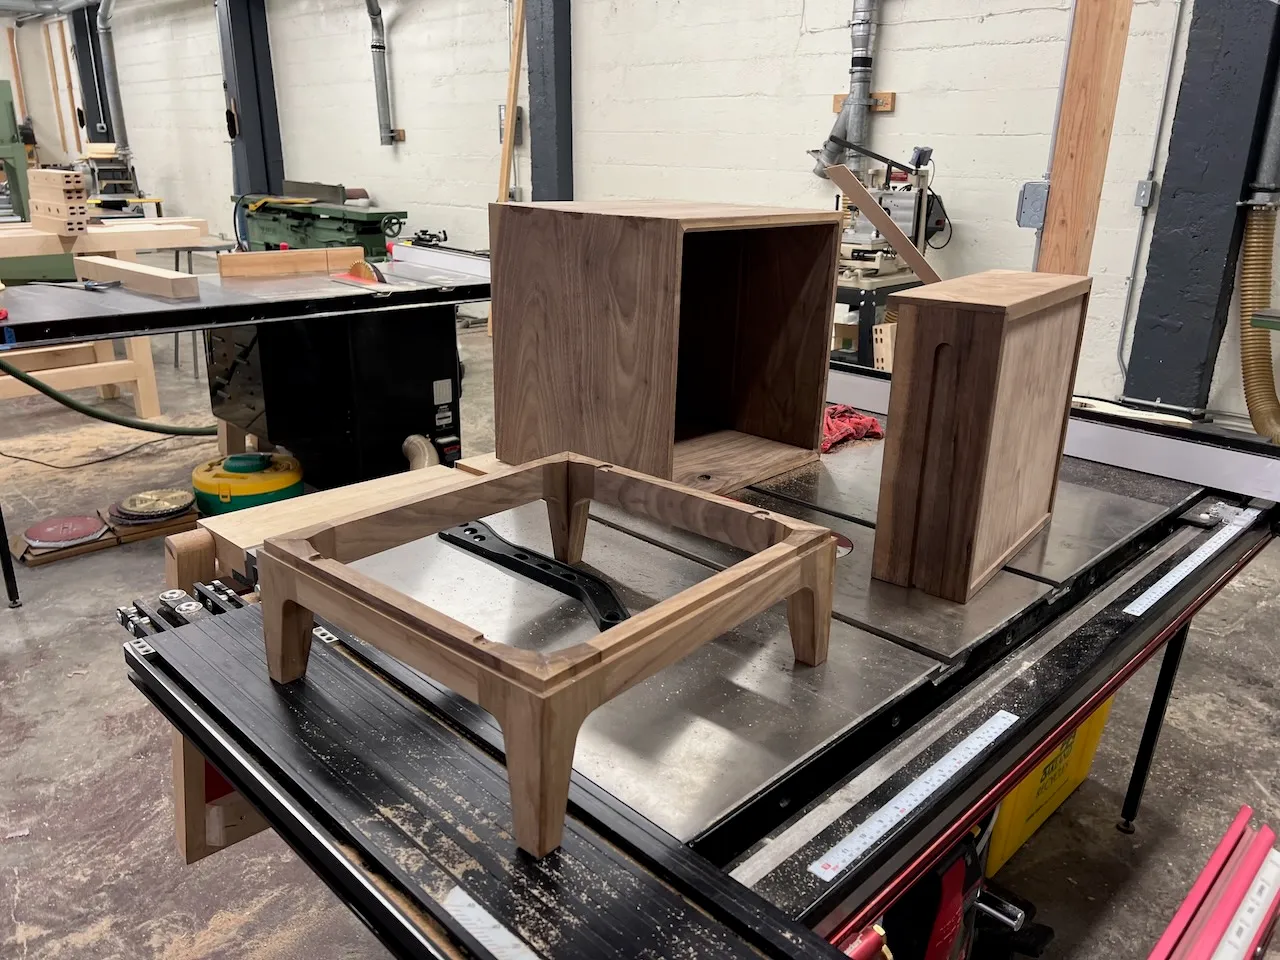
Making the box
Panel glue-ups, miter cuts, and dominos. Getting a little bit more proficient here.
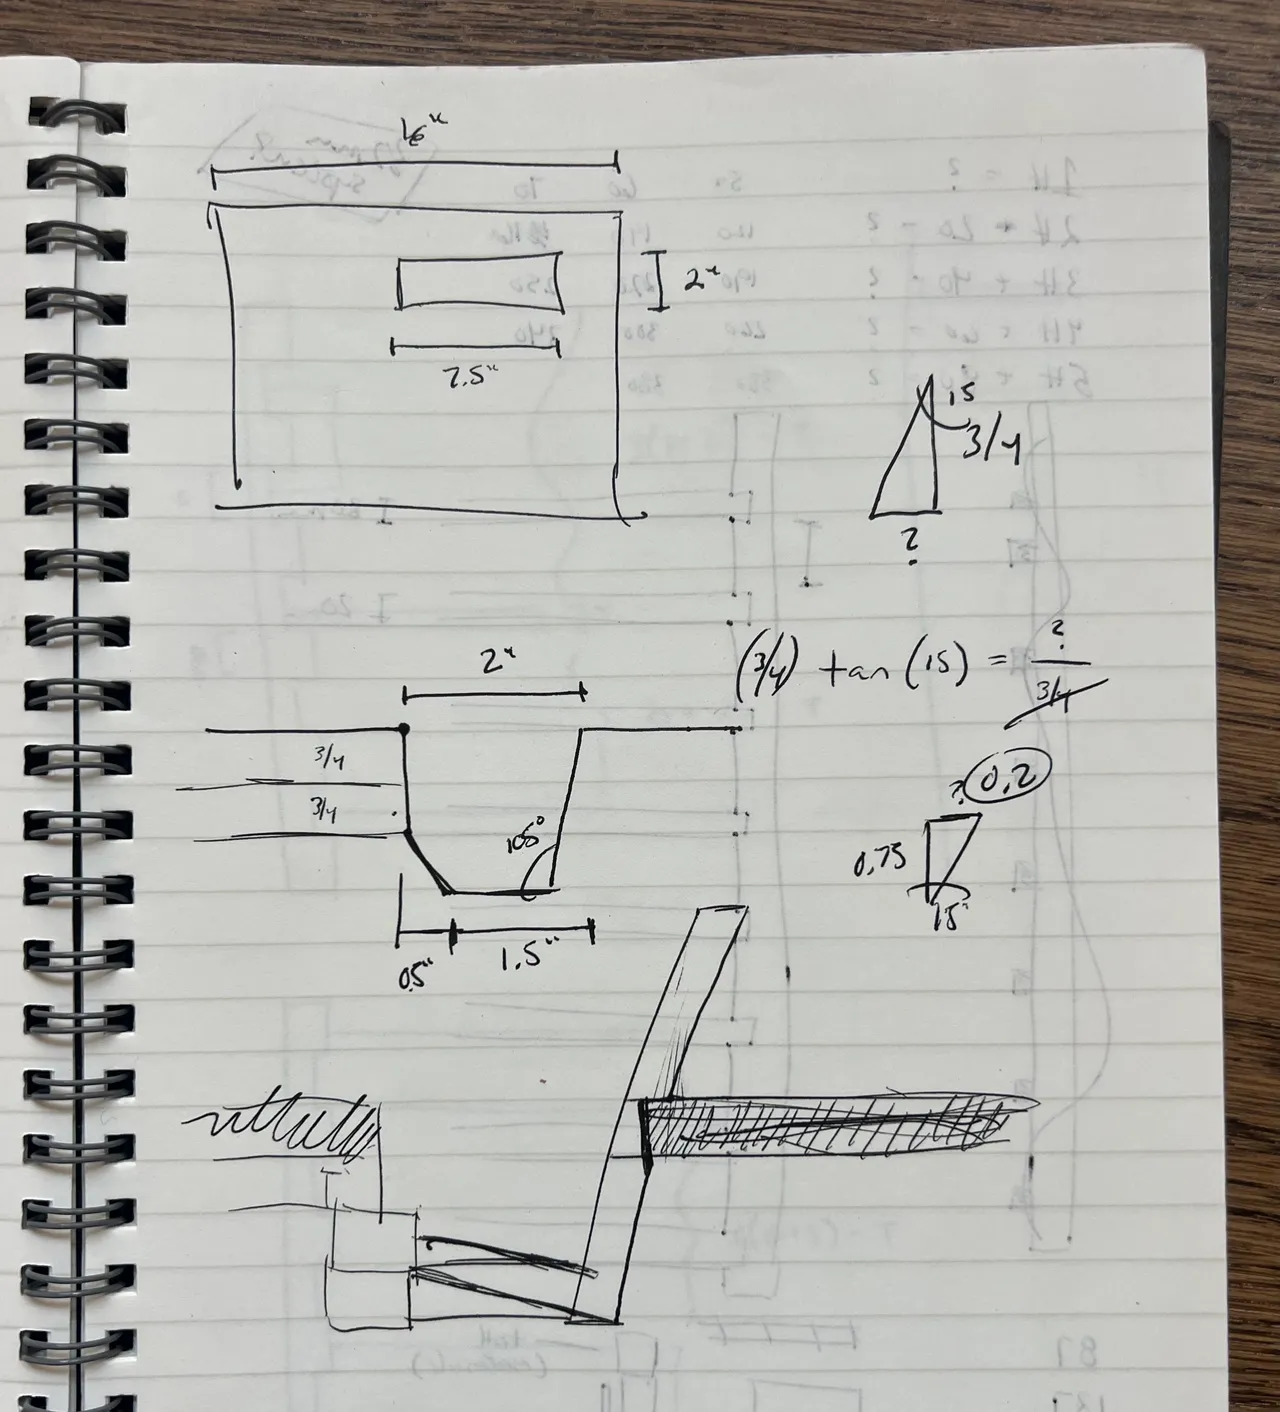
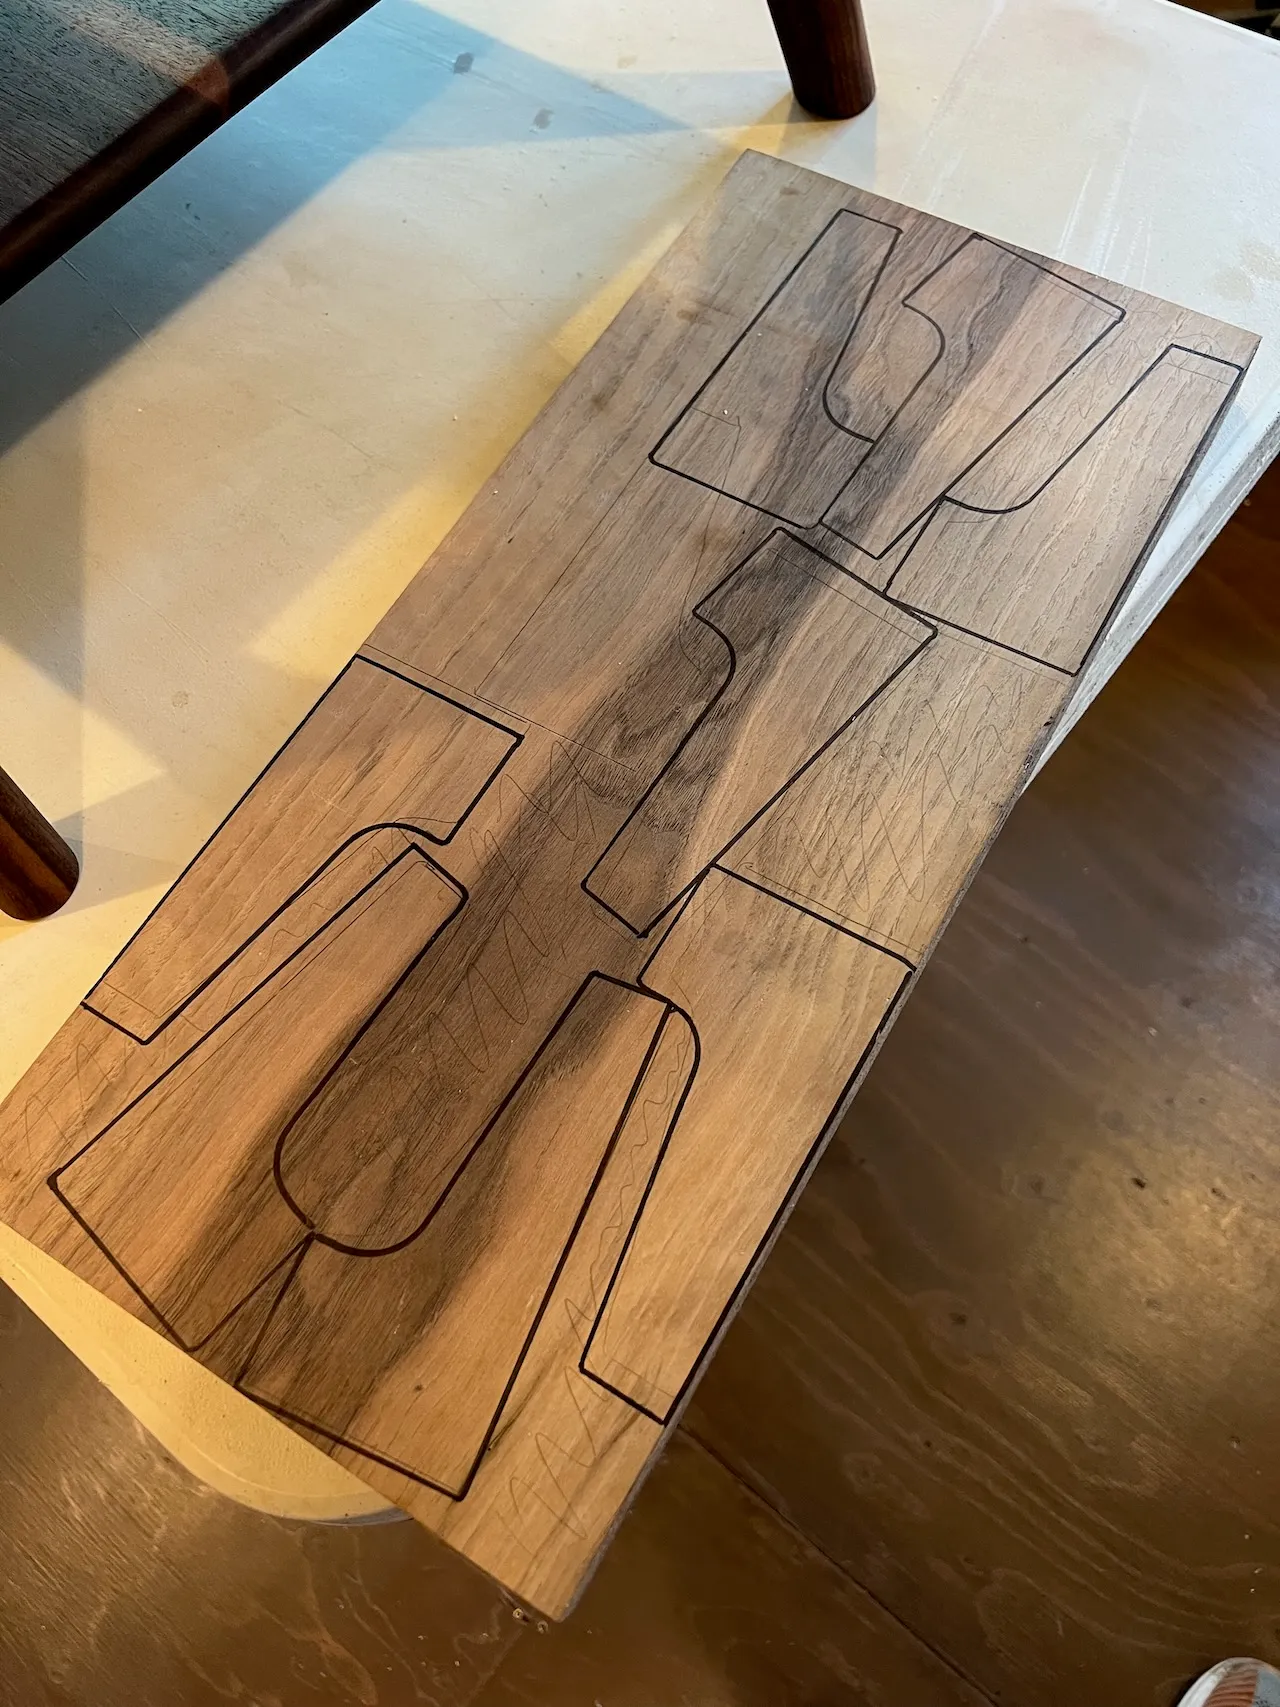
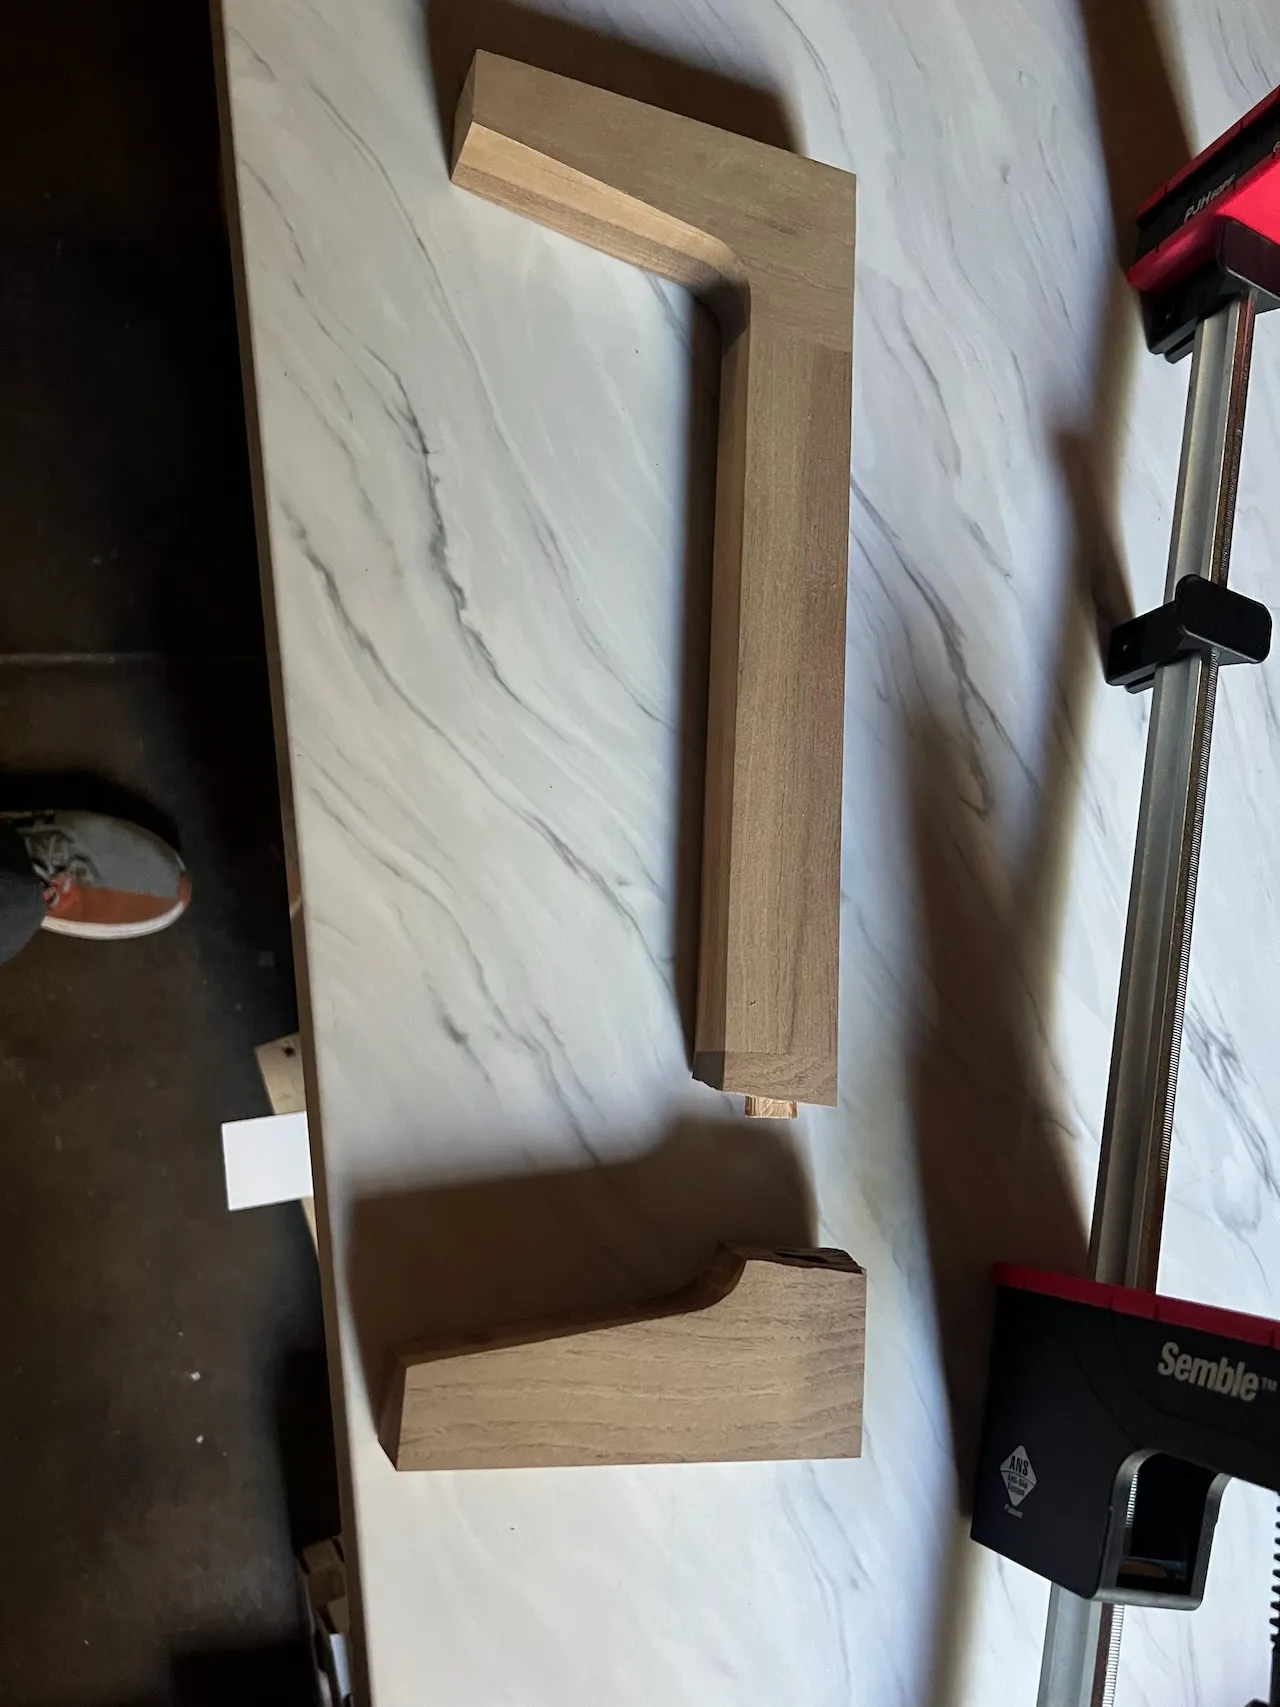
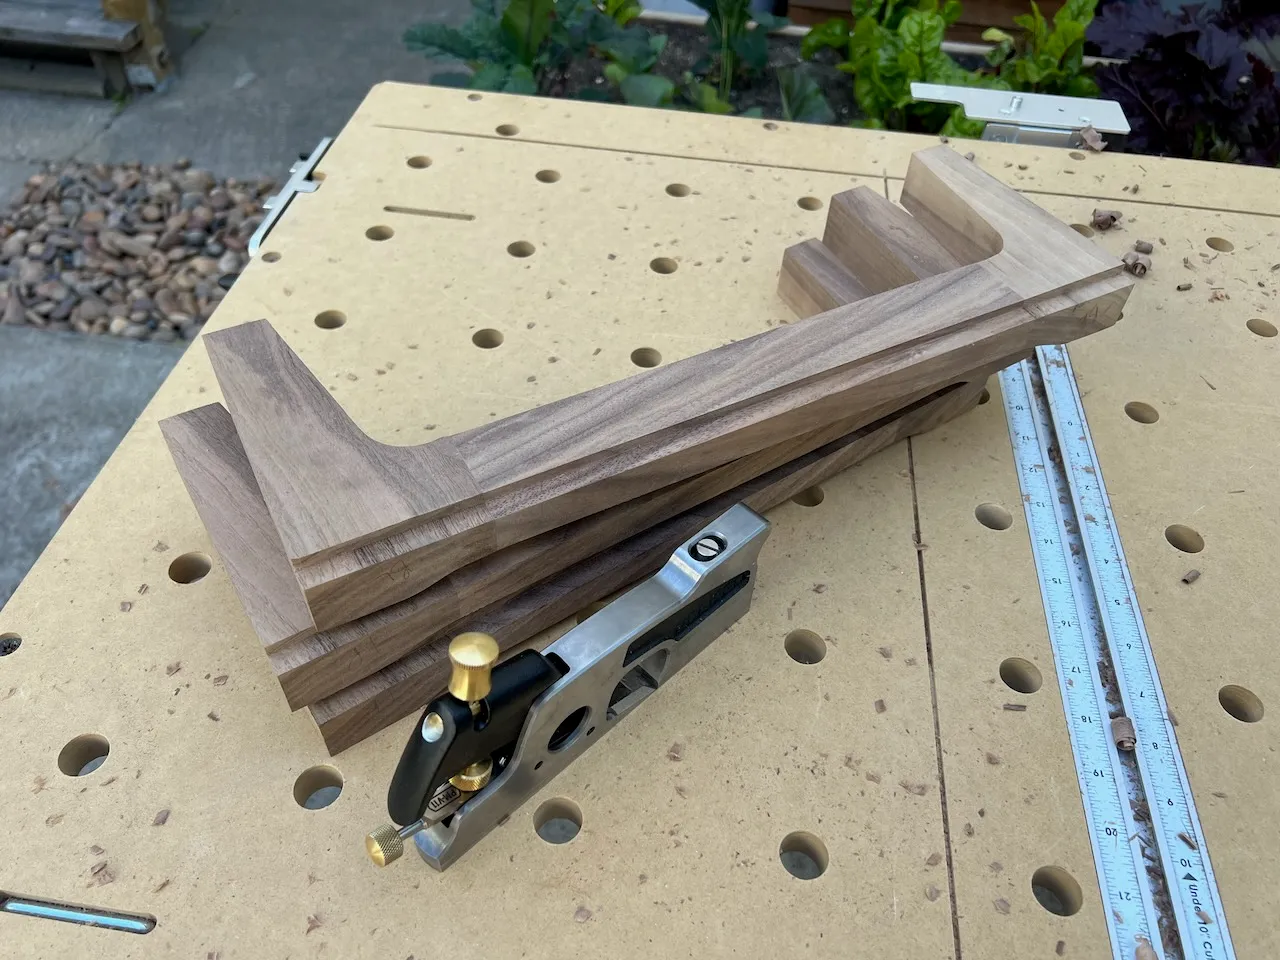
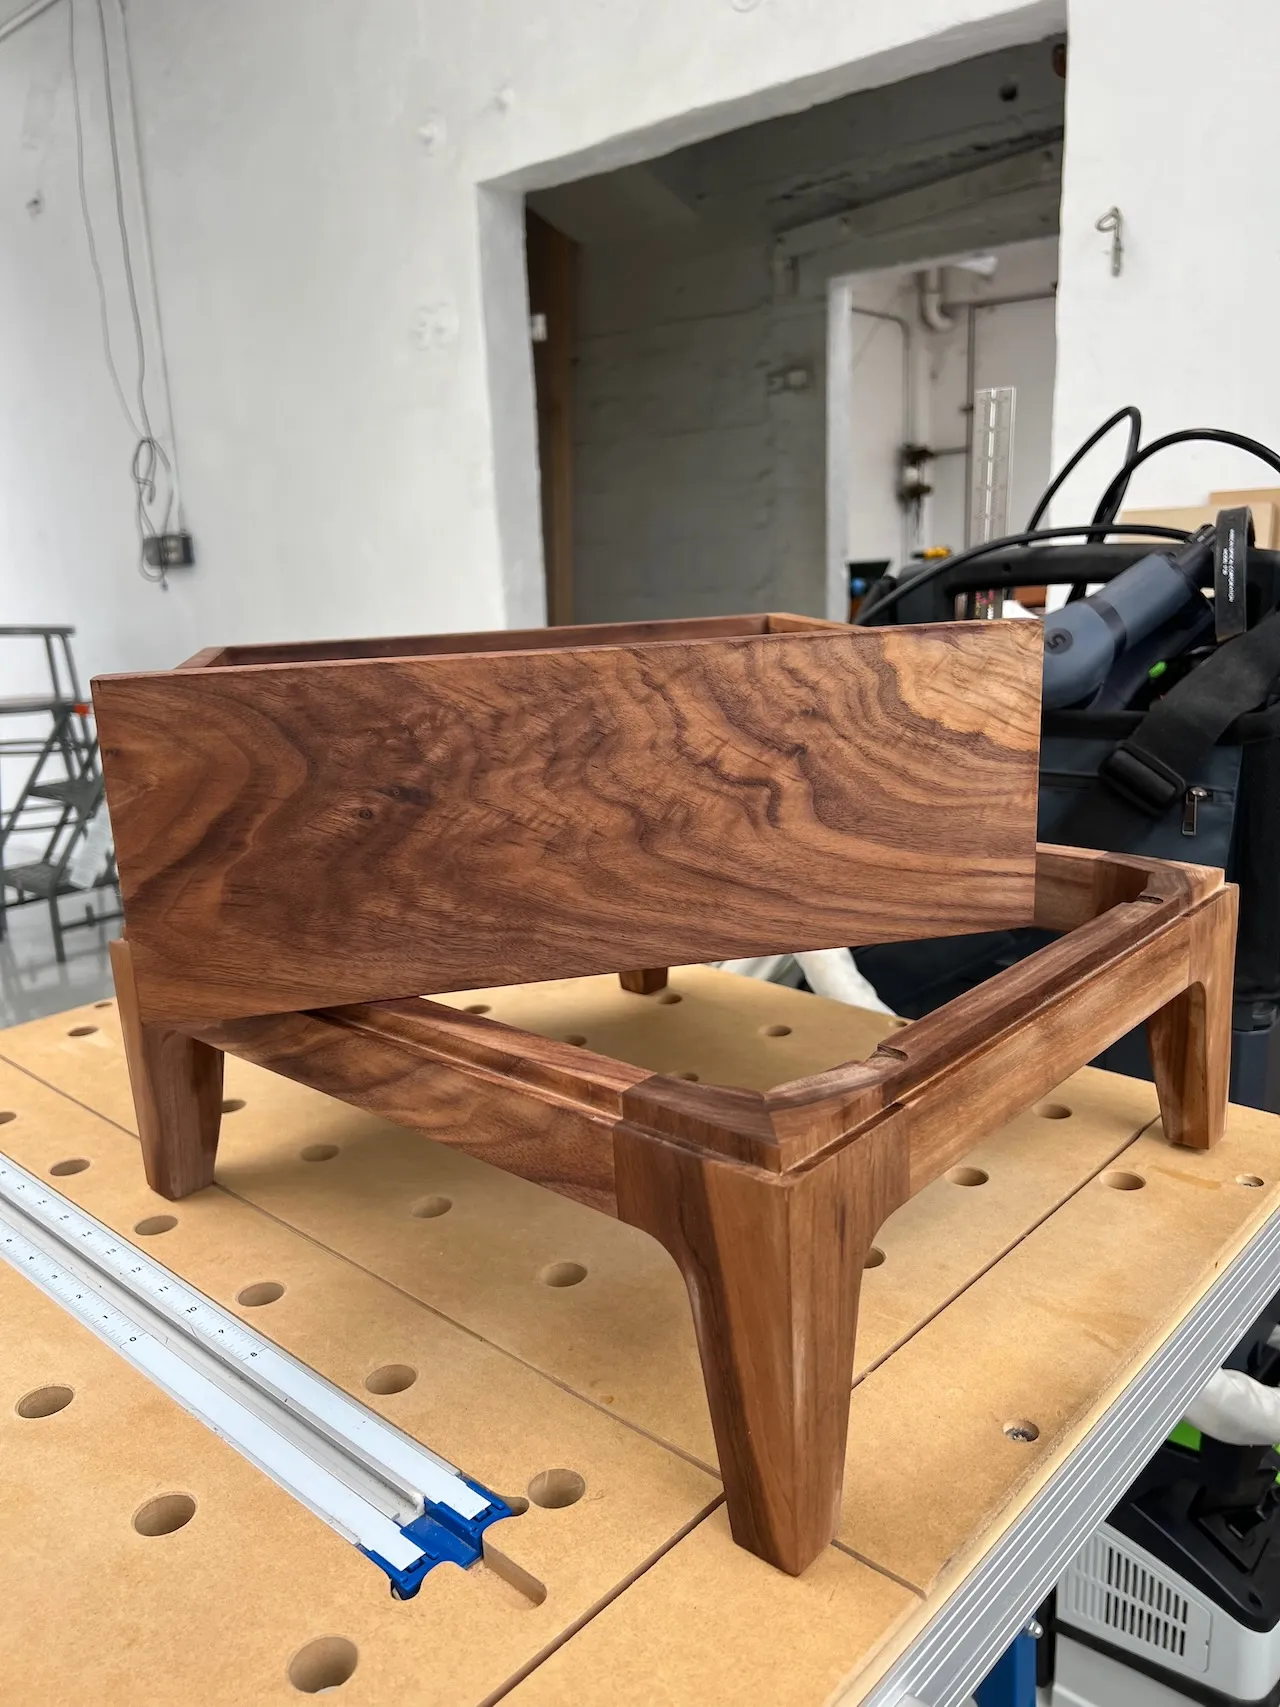
Making the base
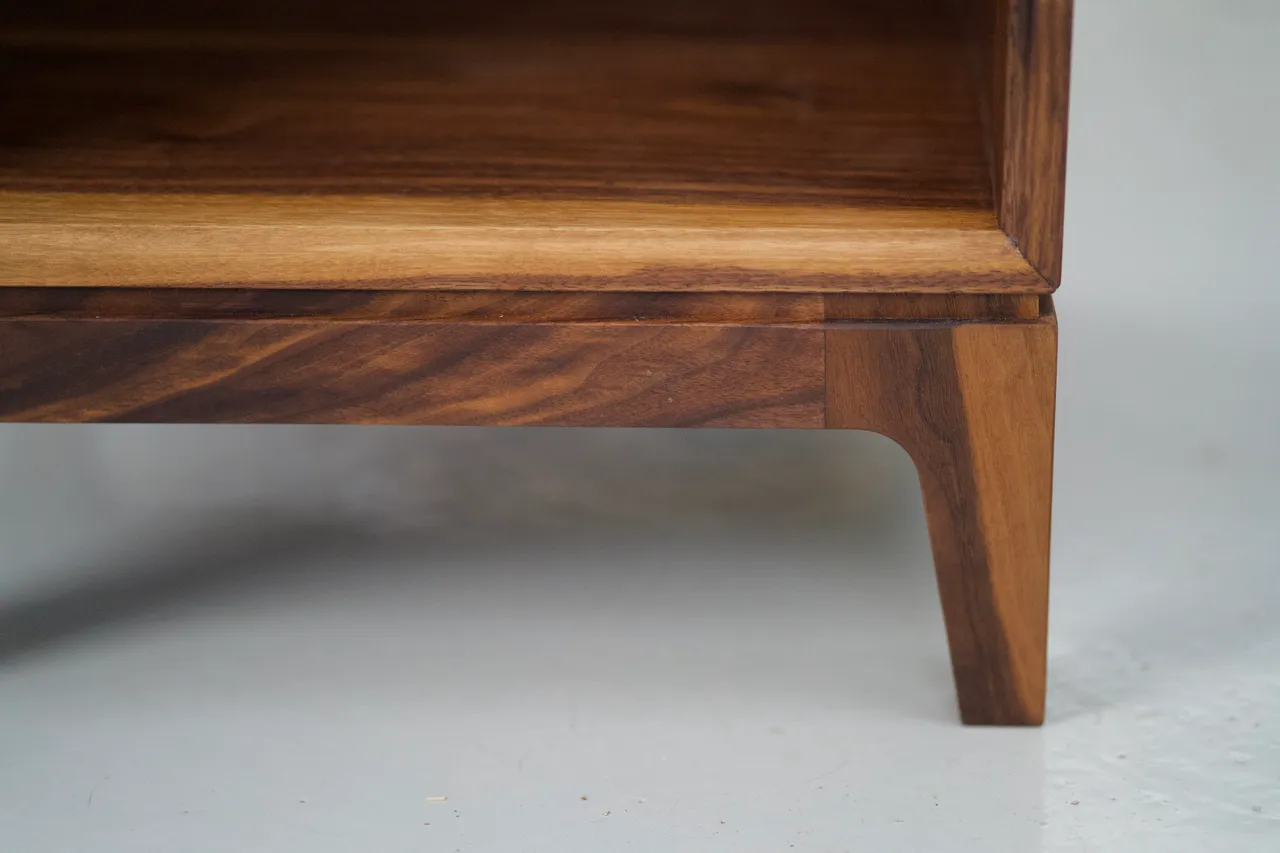
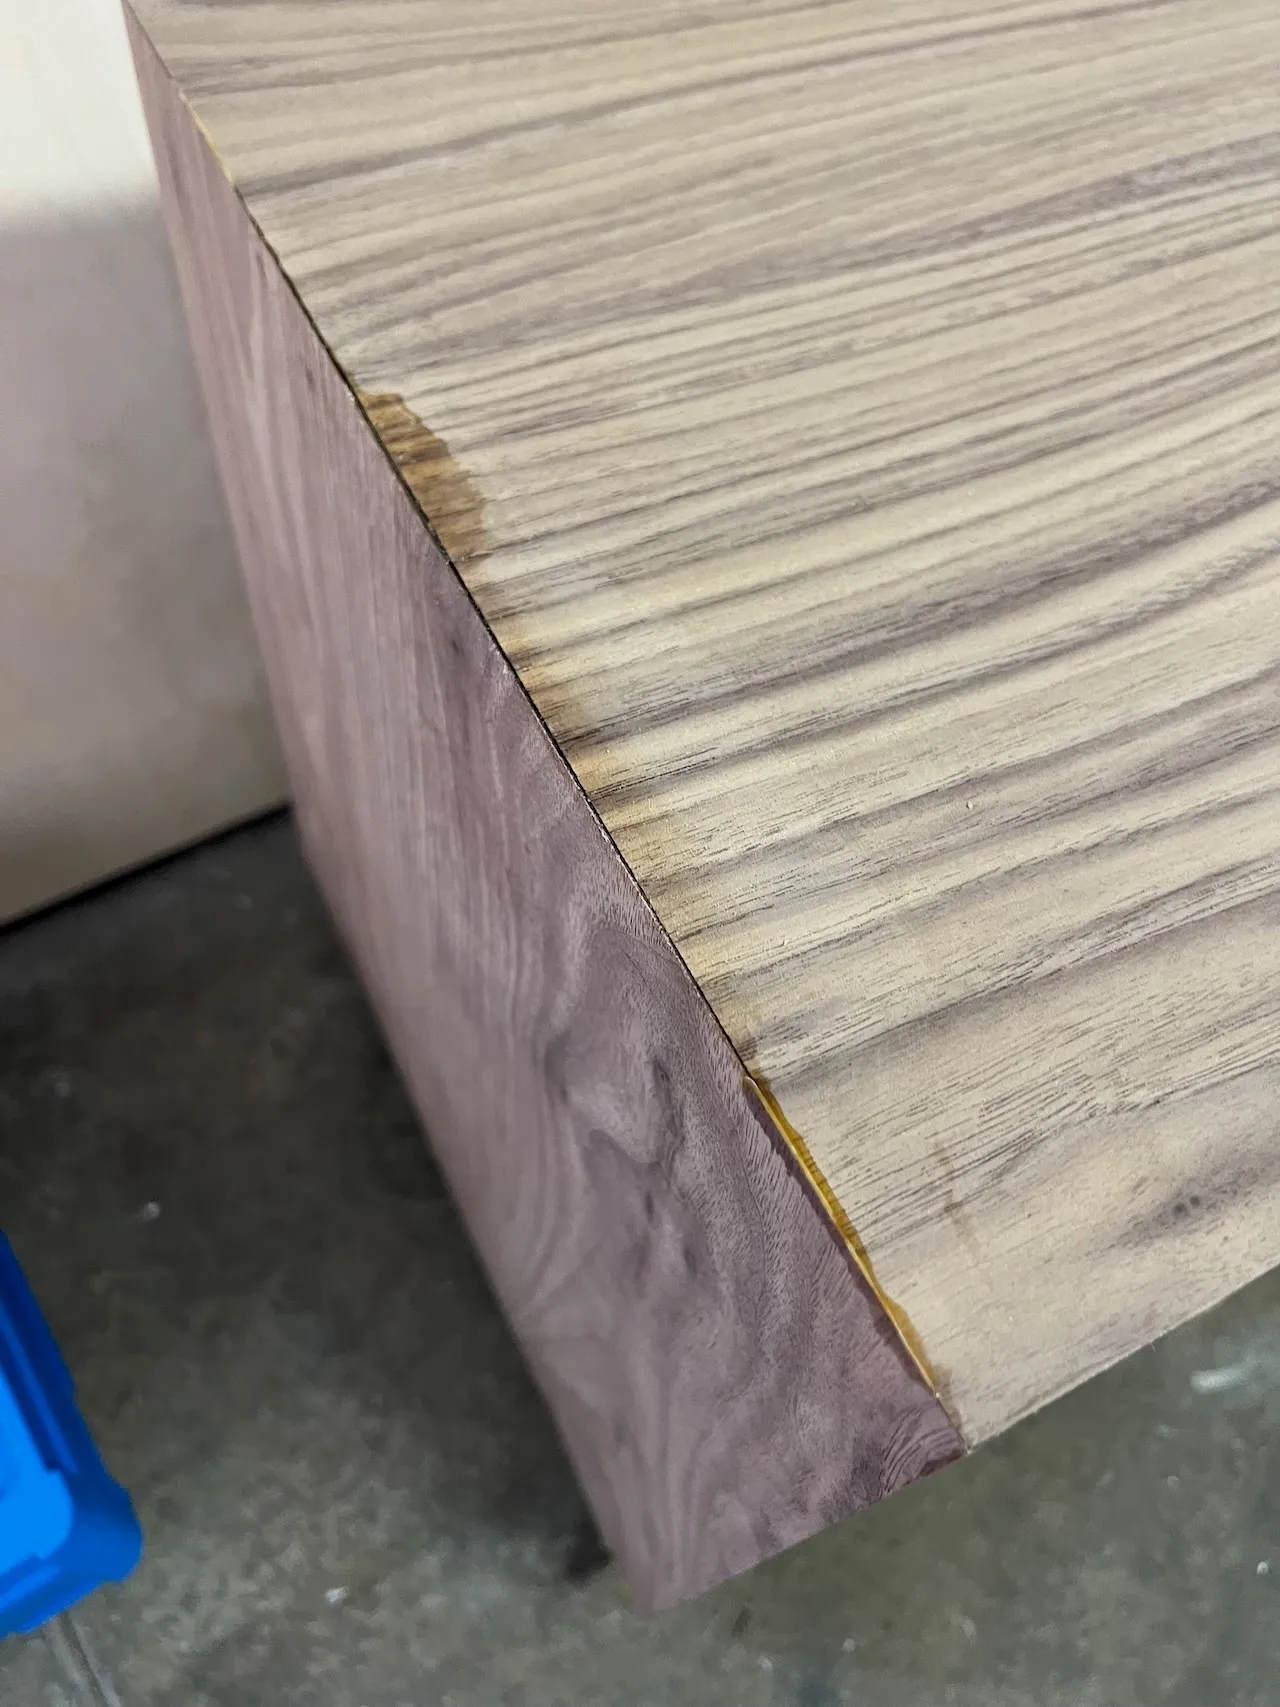
After enjoying the nature of sapwood/heartwood contrast on the coffee table, I specifically arranged my legs to incorporate these transitions.
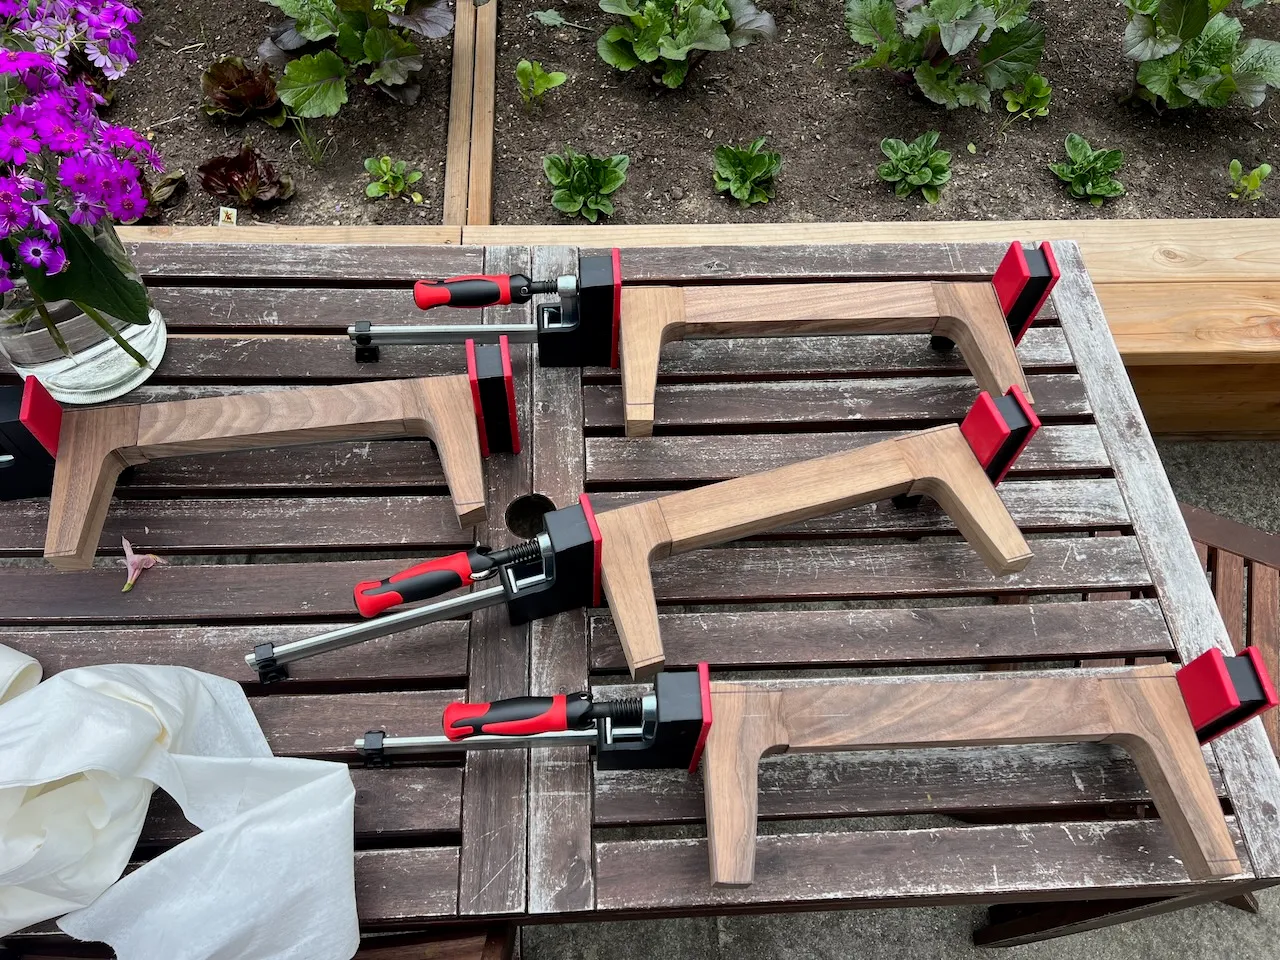
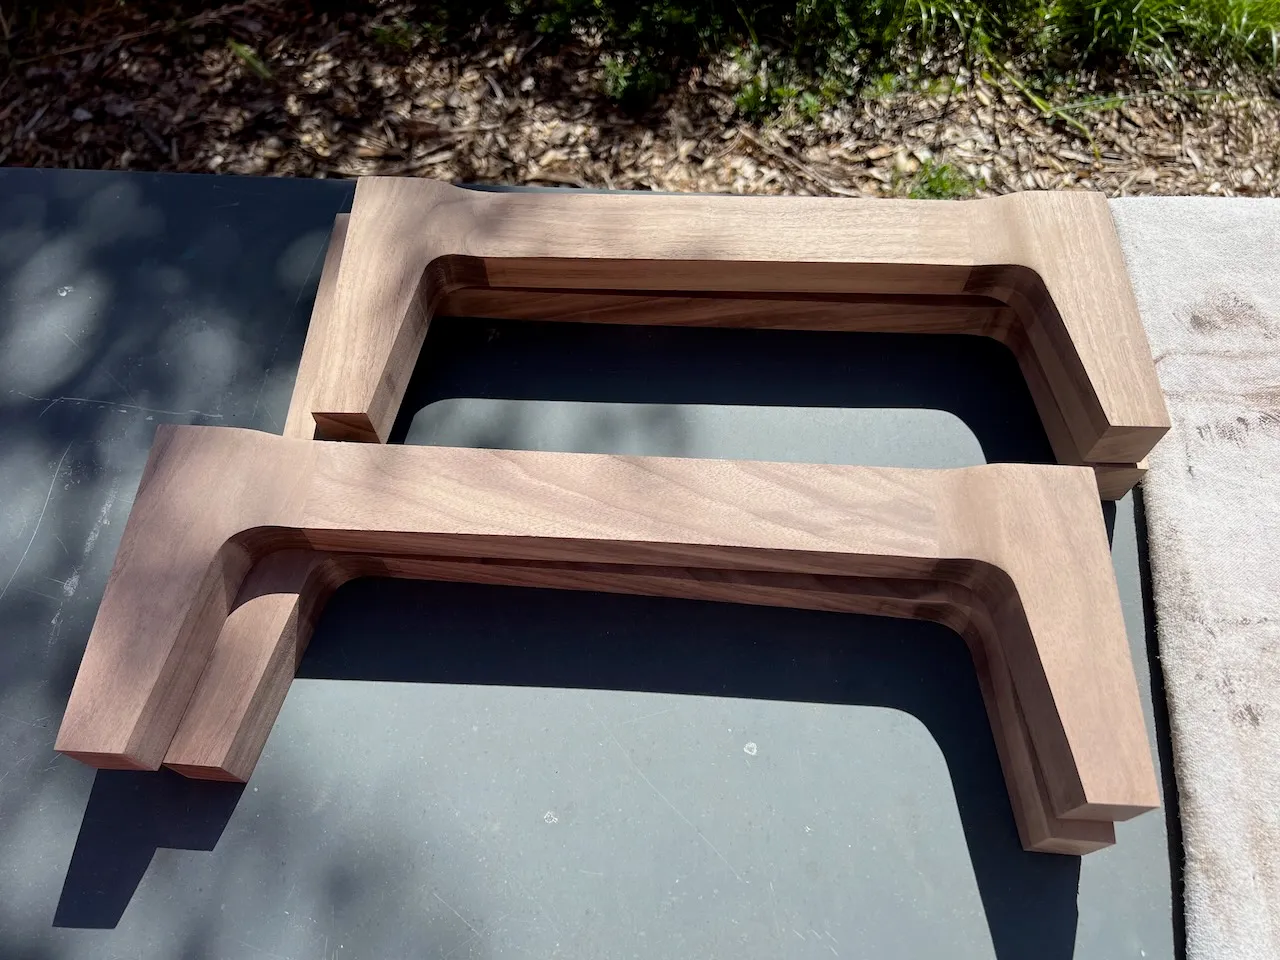
I only had 5/4 for the stretchers, so I neatly transitioned the legs into the stretchers with a subtle interior curve, which no one will ever see, but I know it's there!
Whoops! Easiest way to ruin your project is to drop it. But I was thankful, this mishap revealed that I'm definitely not using enough glue in my domino joints!
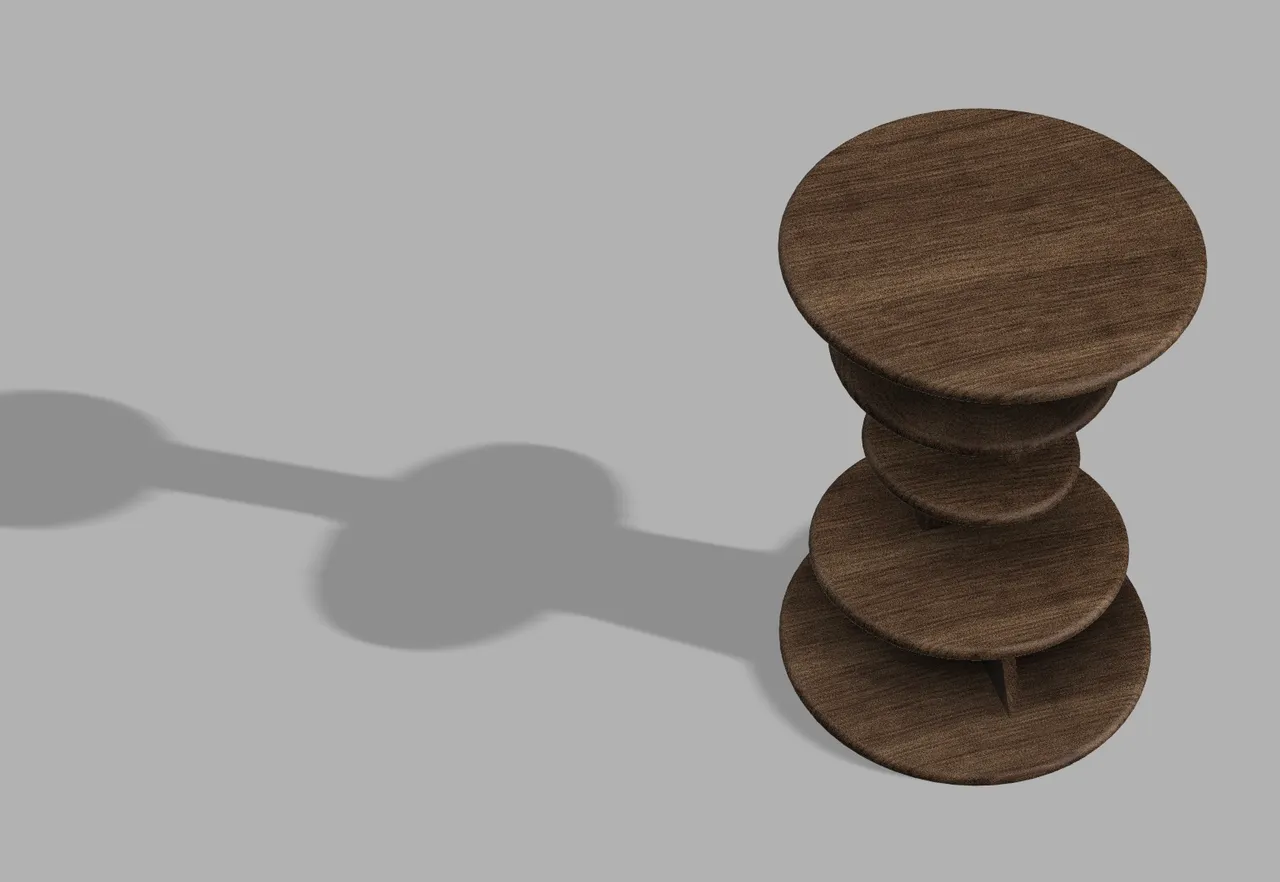
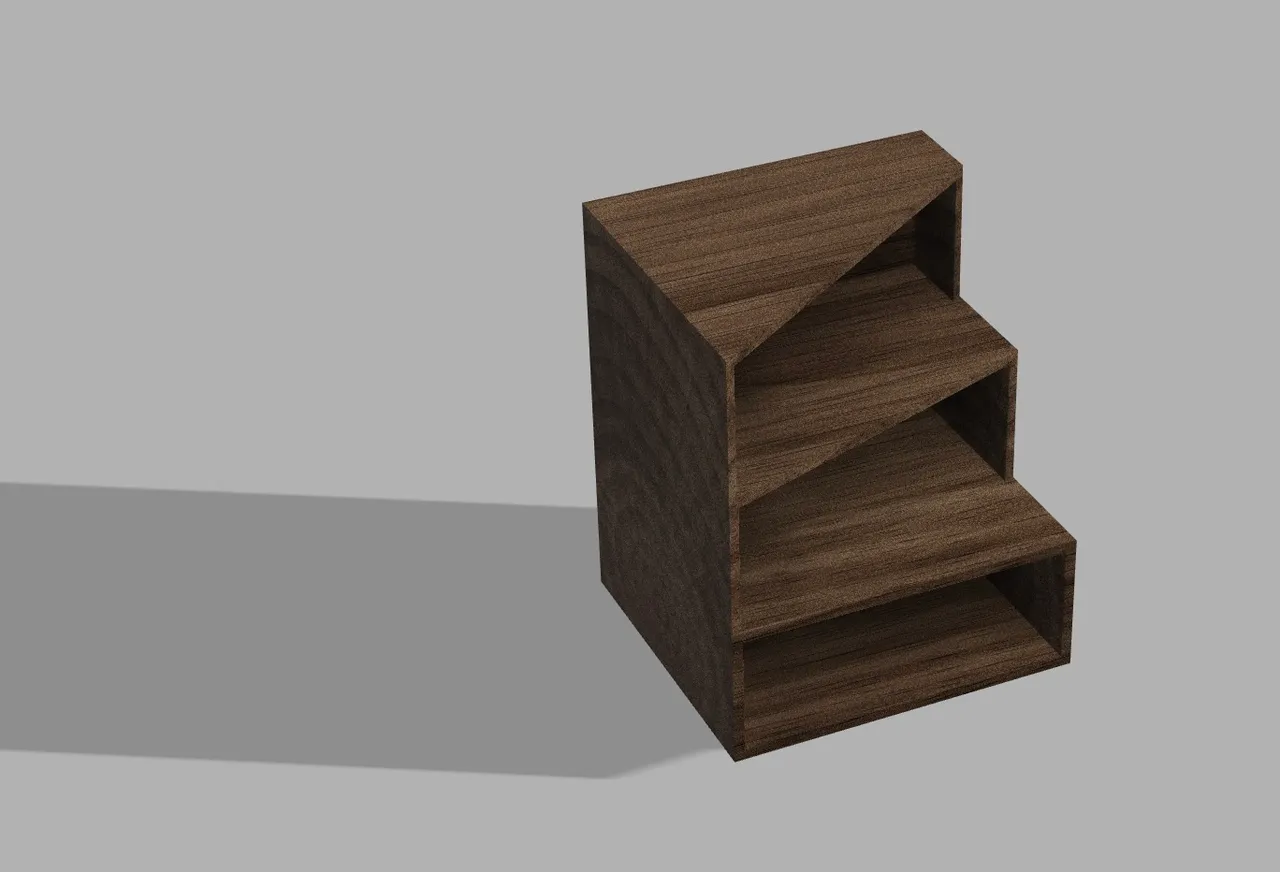
Book holder?
I played around with integrating a book holder into the top of the table but concluded it was too cute, too try-hard, too gimmicky, so I scrapped the idea.

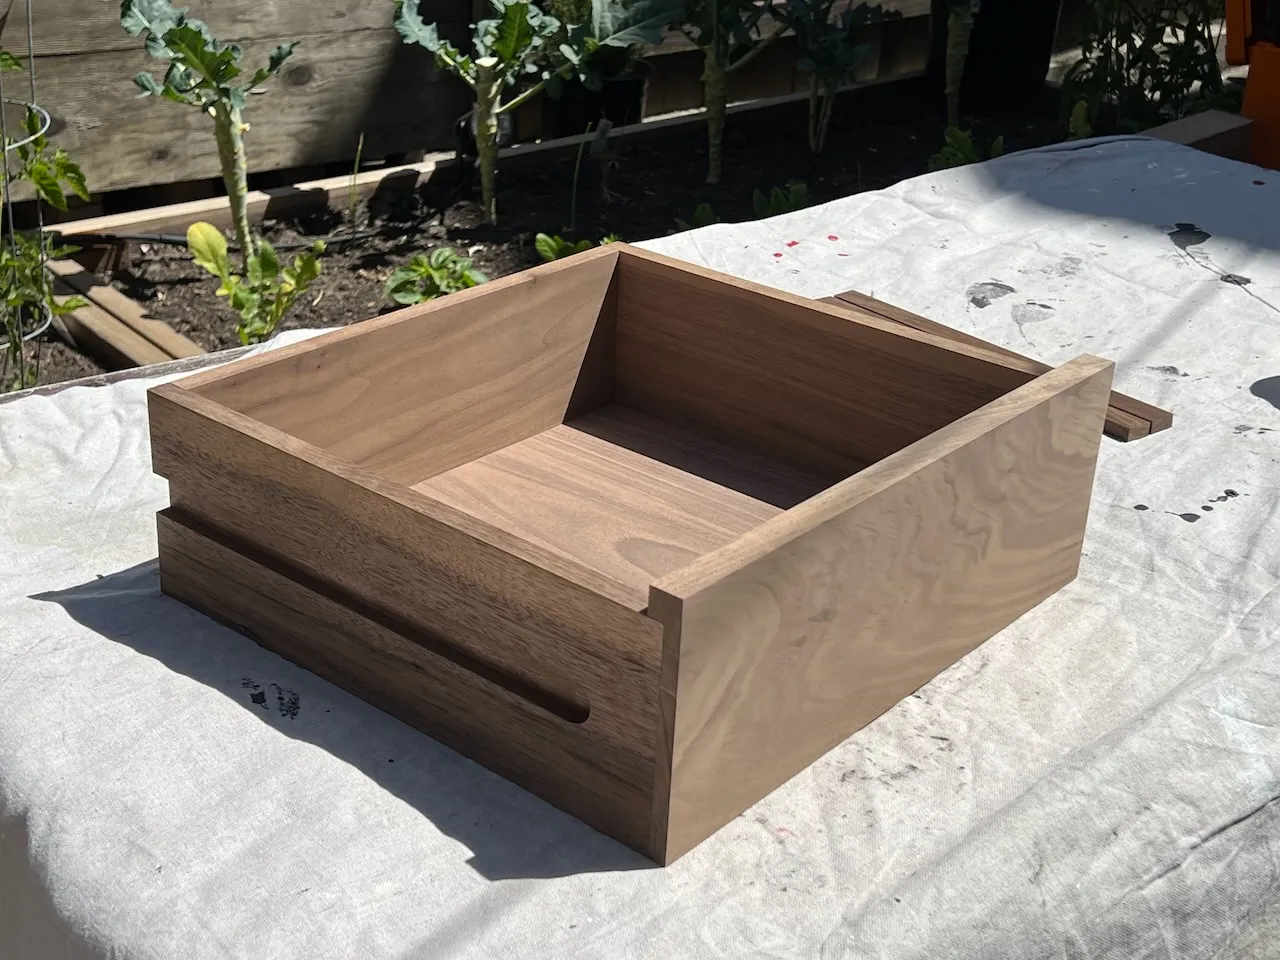
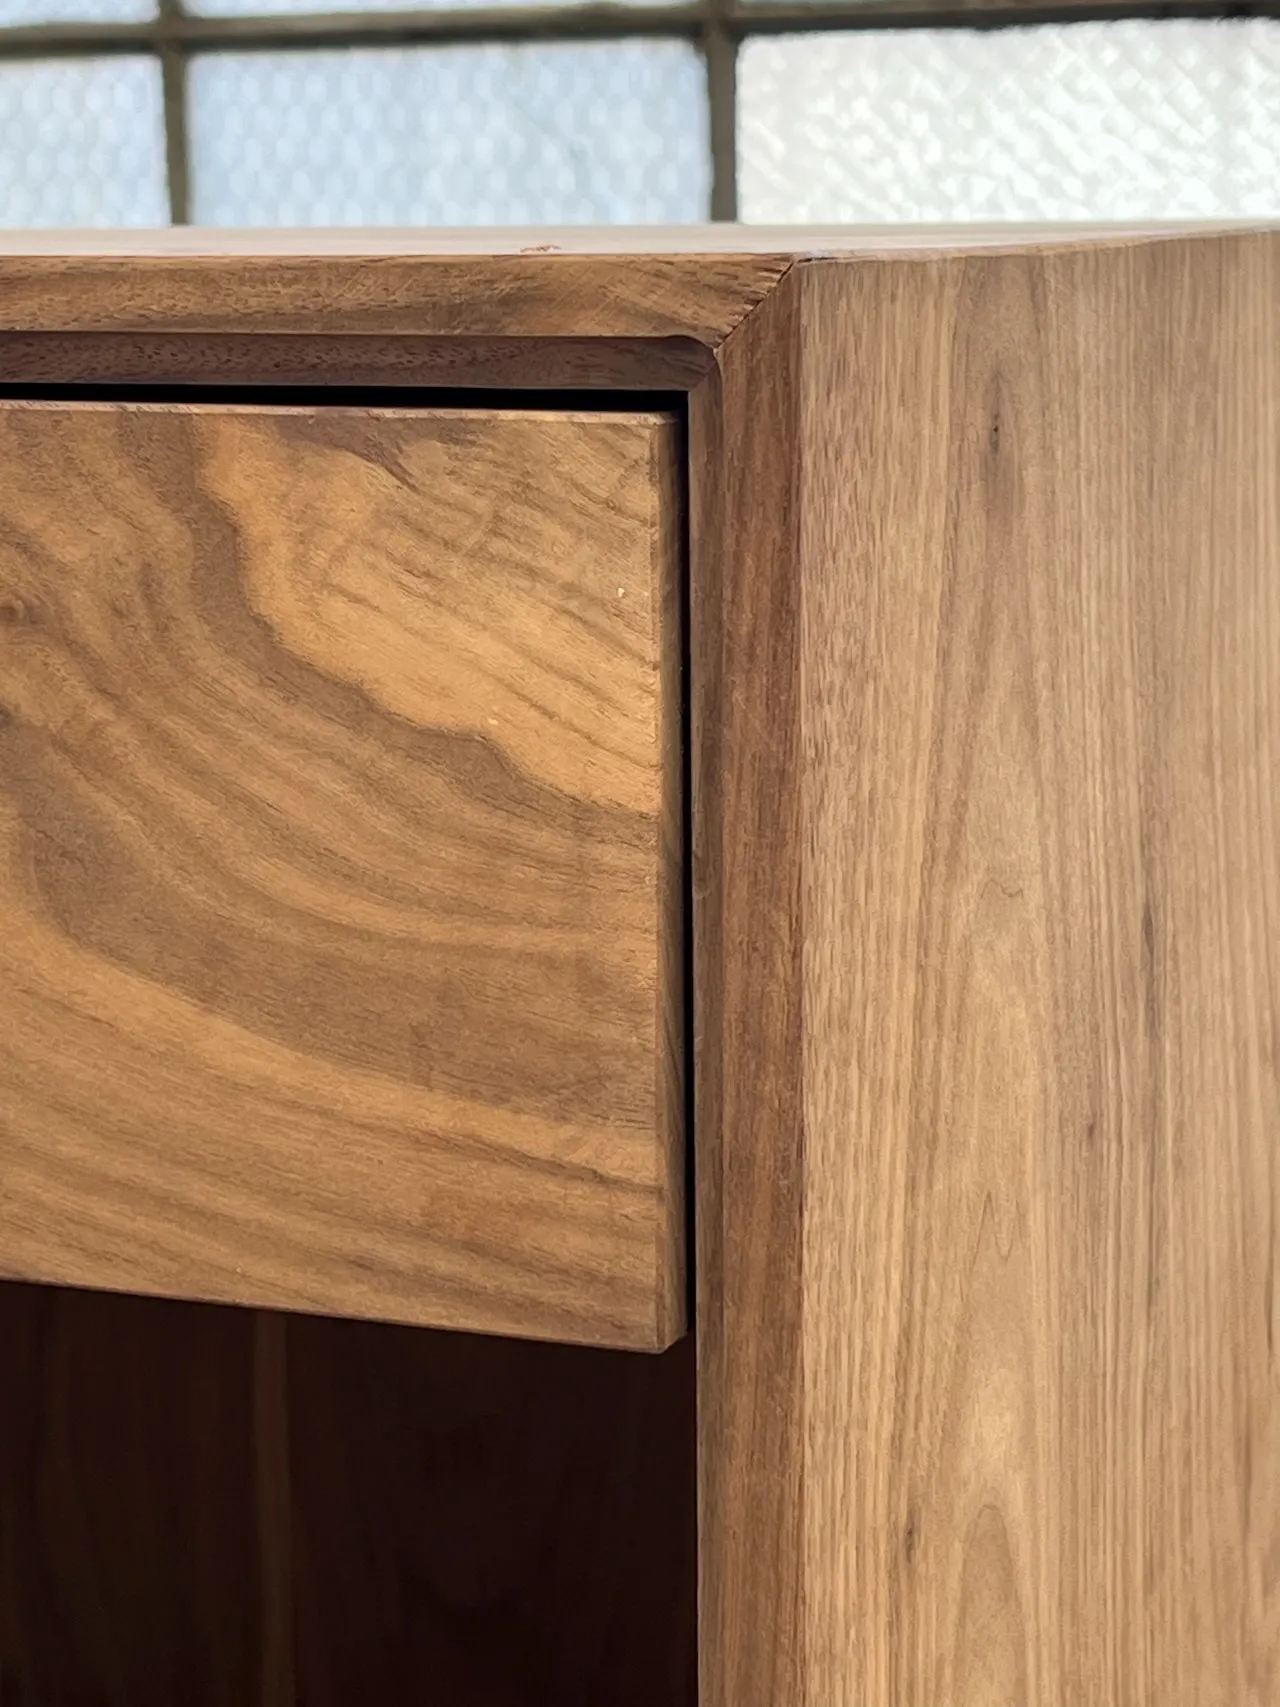
Drawer & drawer slide
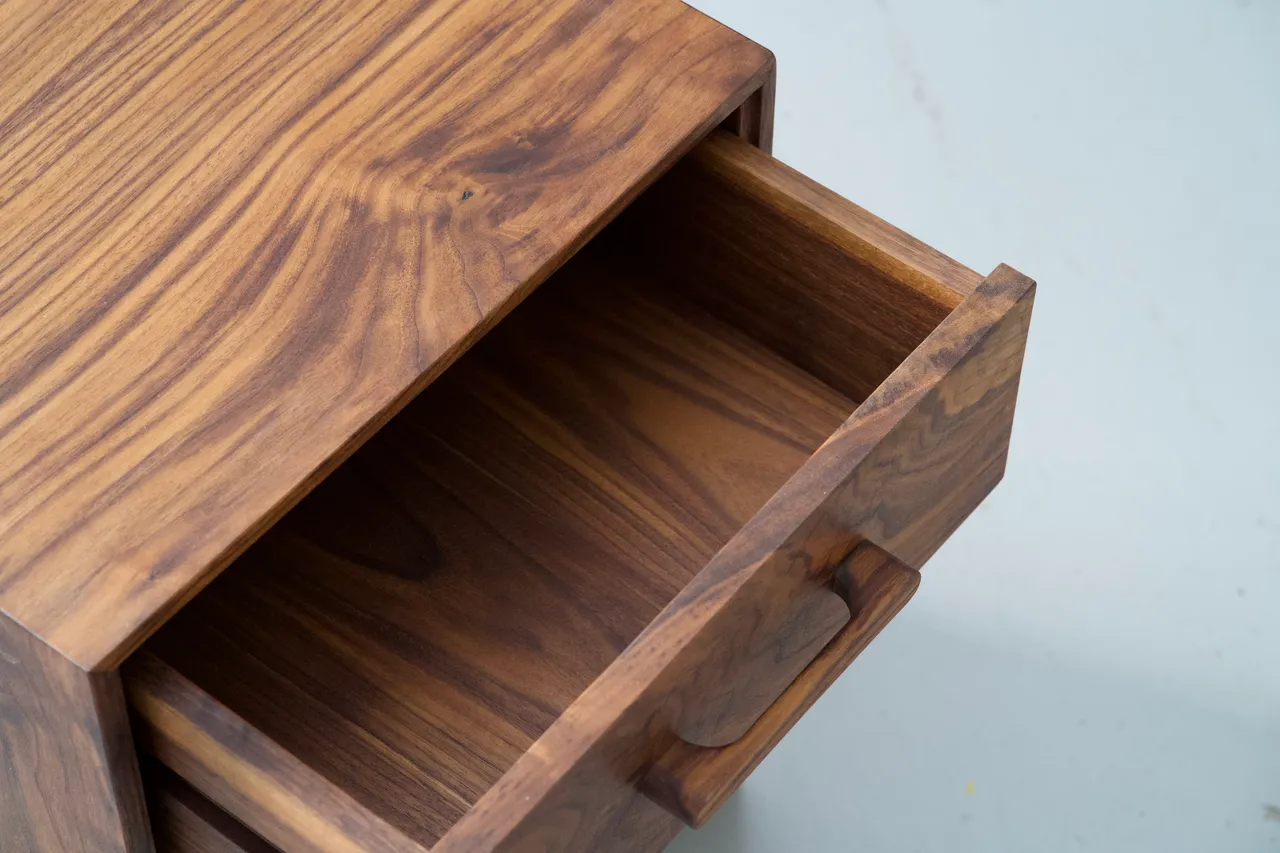
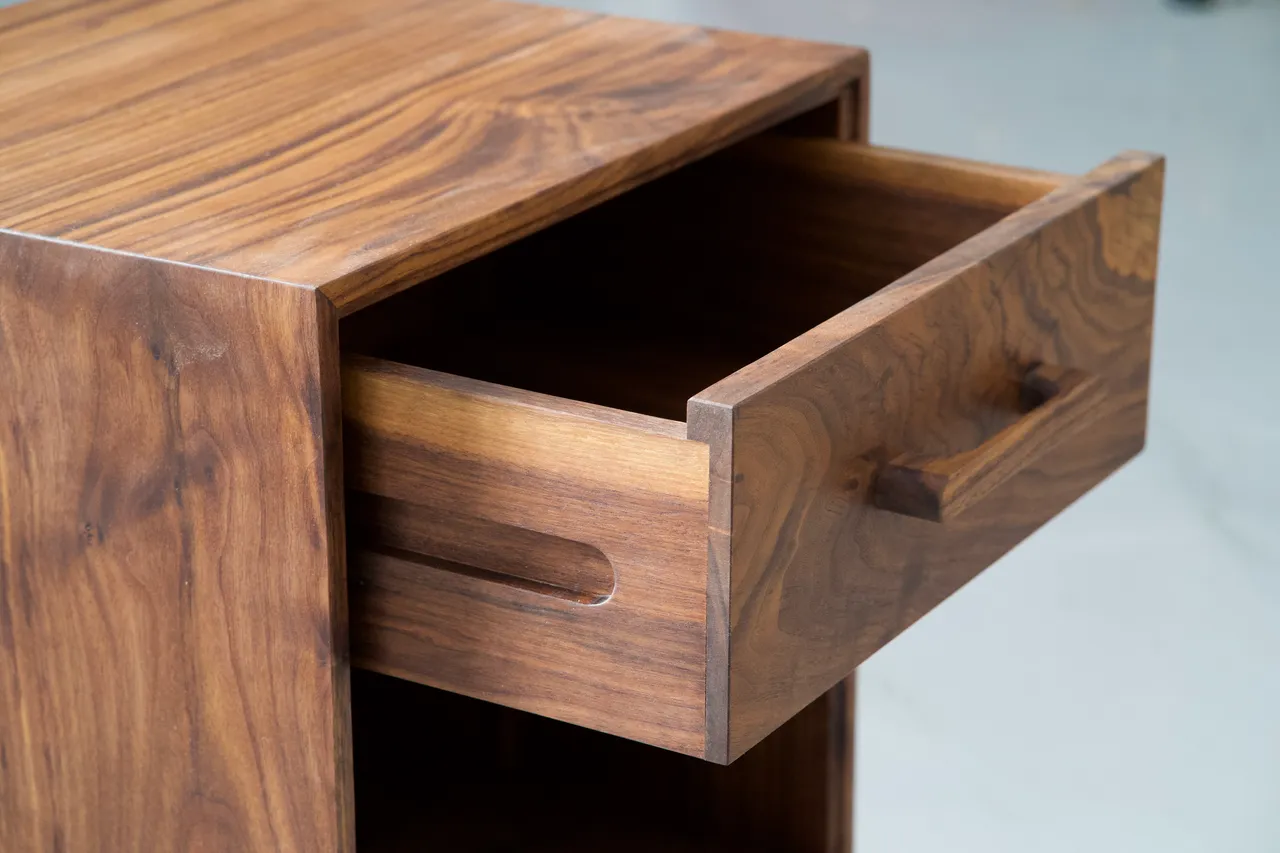
This is the first drawer I've ever made and I think it came out pretty well. This isn't a dresser, so while not the strongest, I've decided the rabbet joints at the front are just fine.
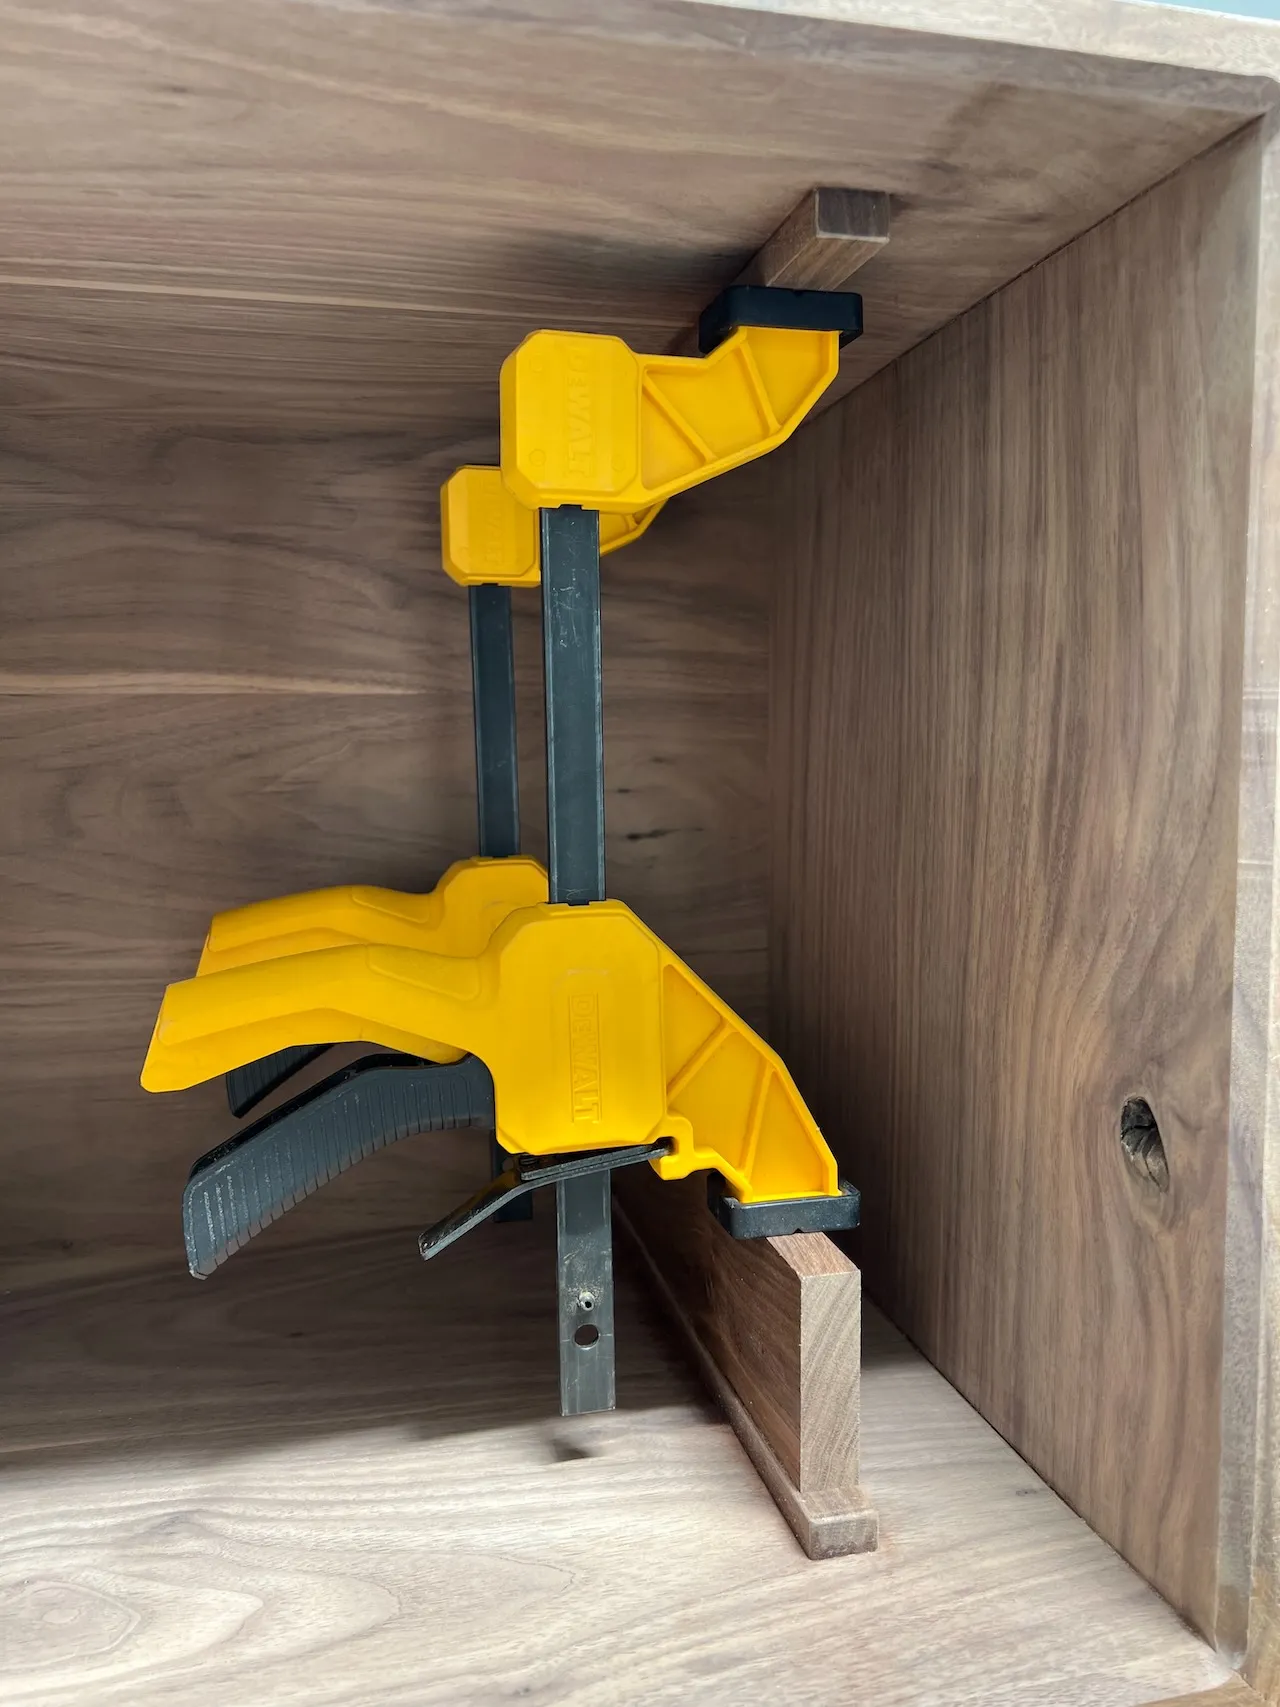
I decided to go with the mid-century European technique of a wooden side drawer slide running in a groove in the drawer box. In the end, I'm not 100% happy with the result (the drawer racks more than I'd like), but hey, first try.
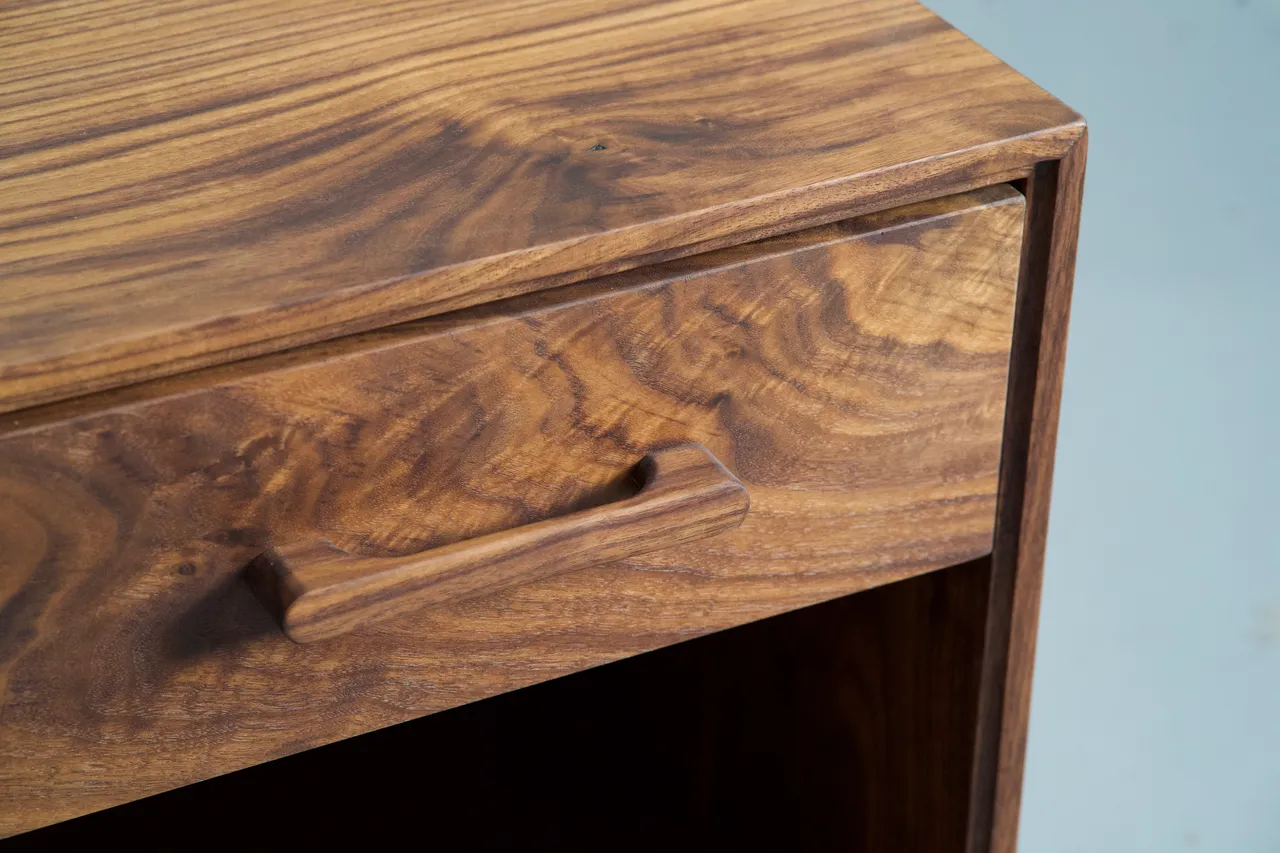
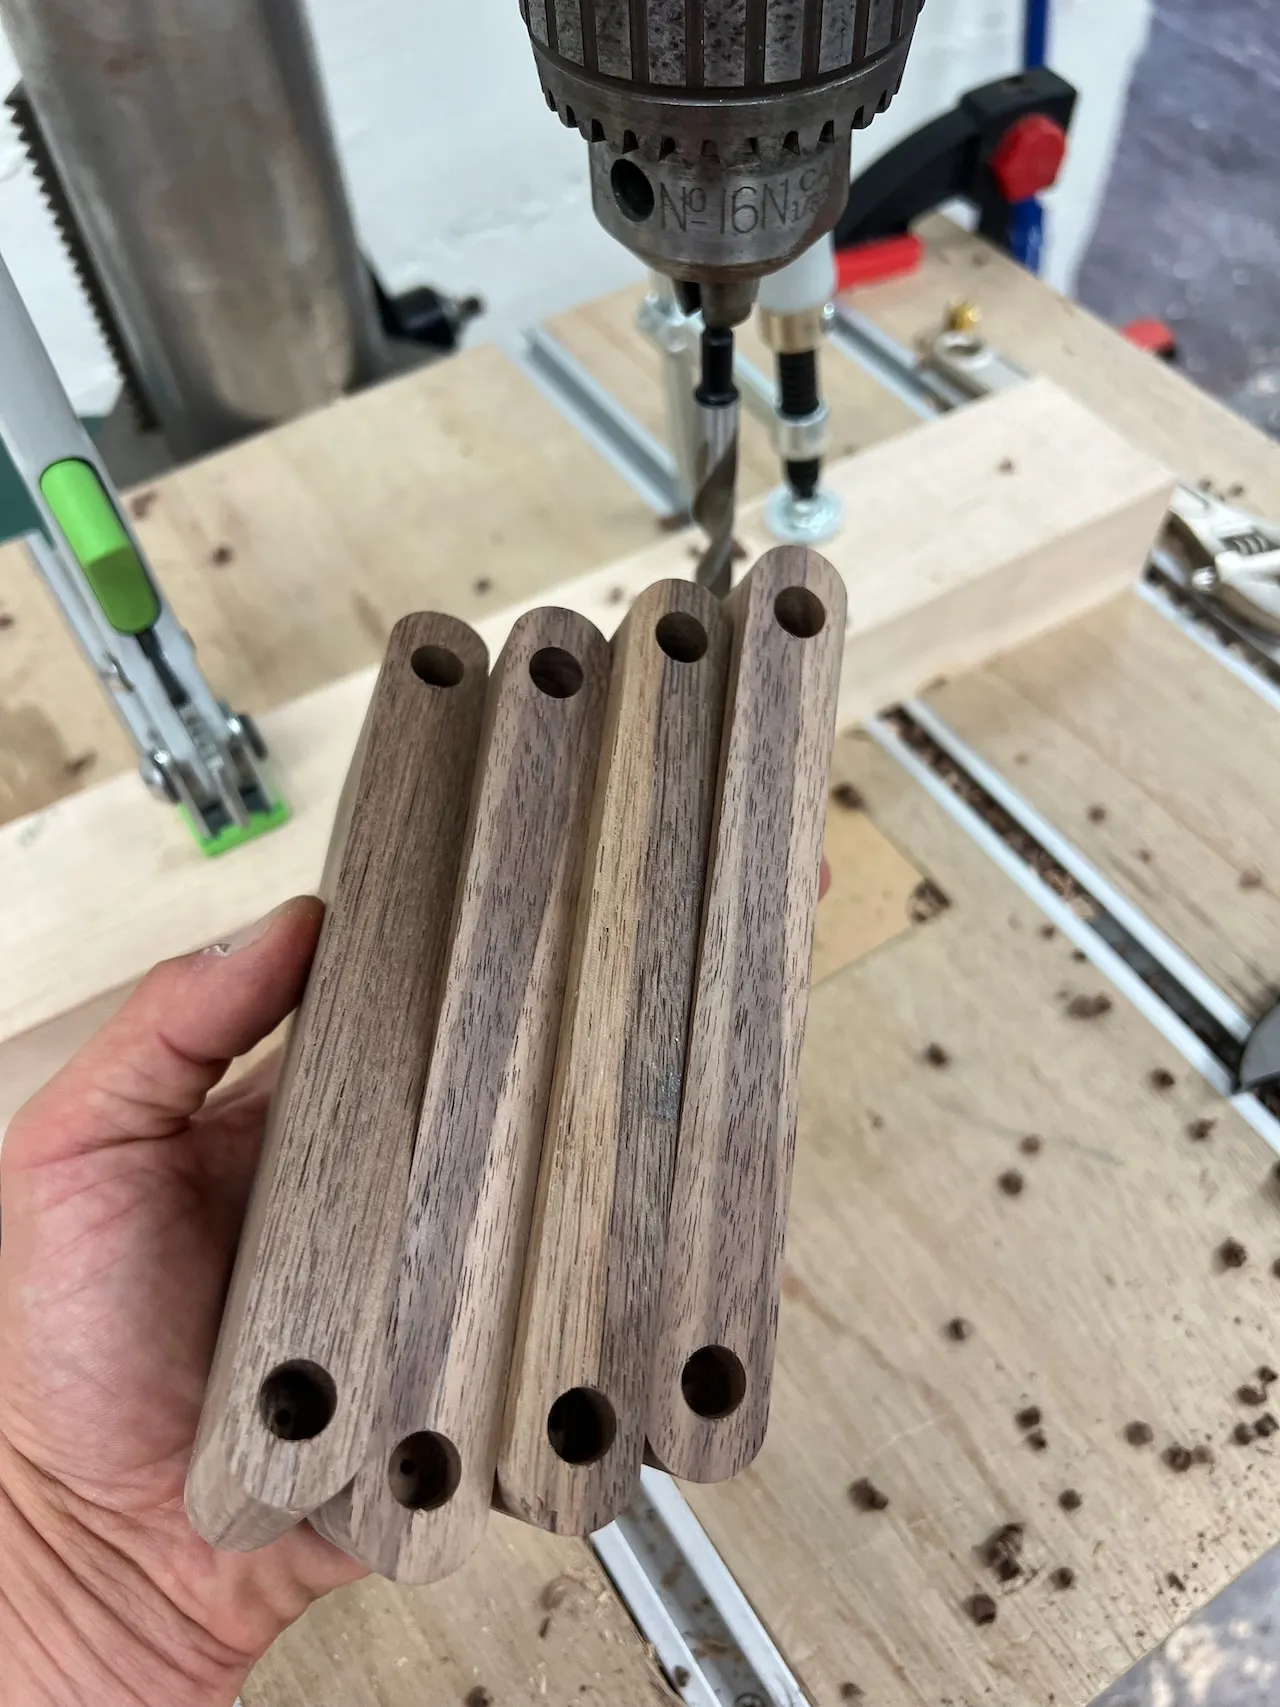
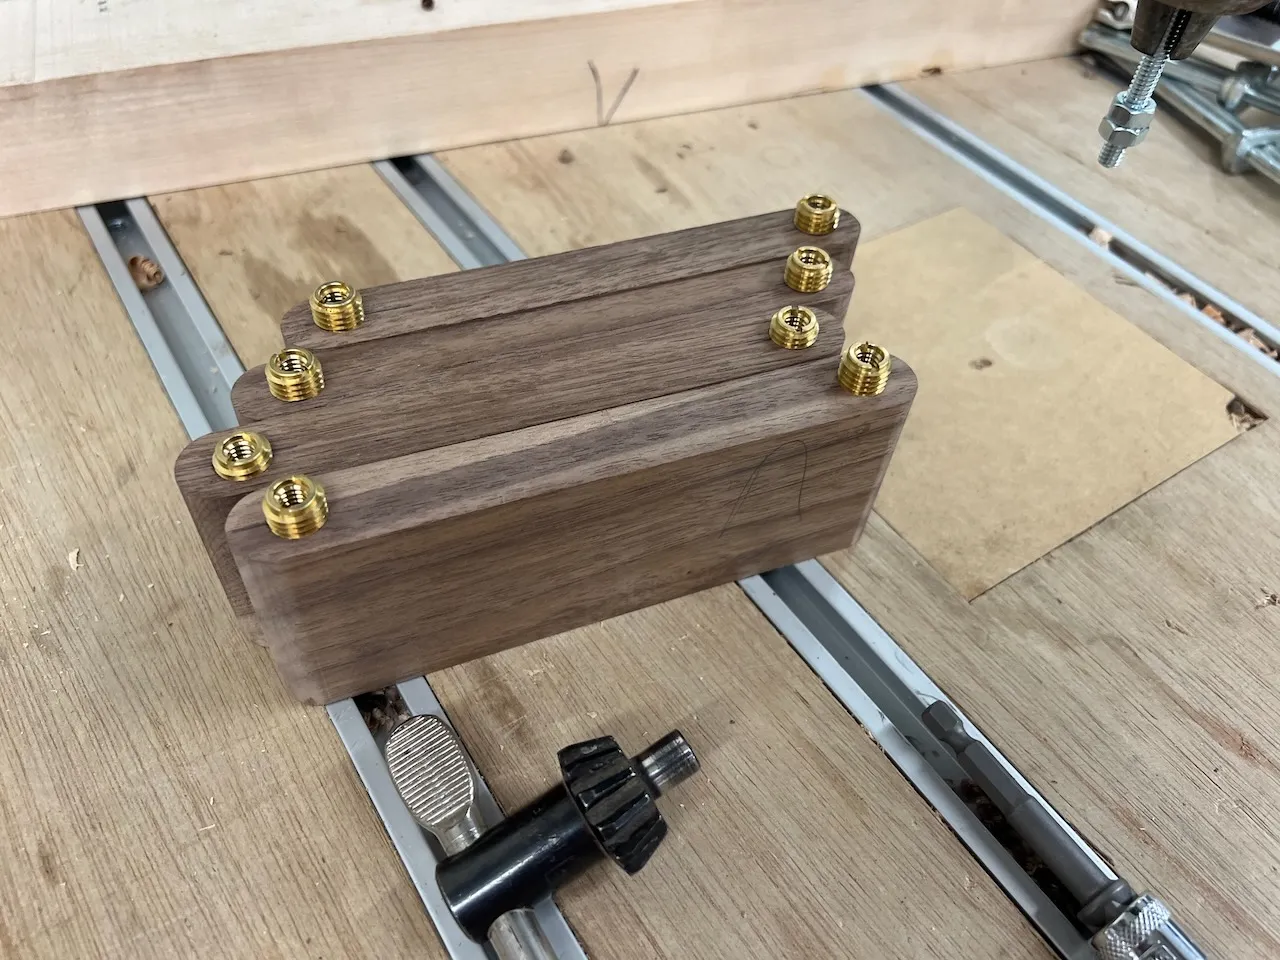
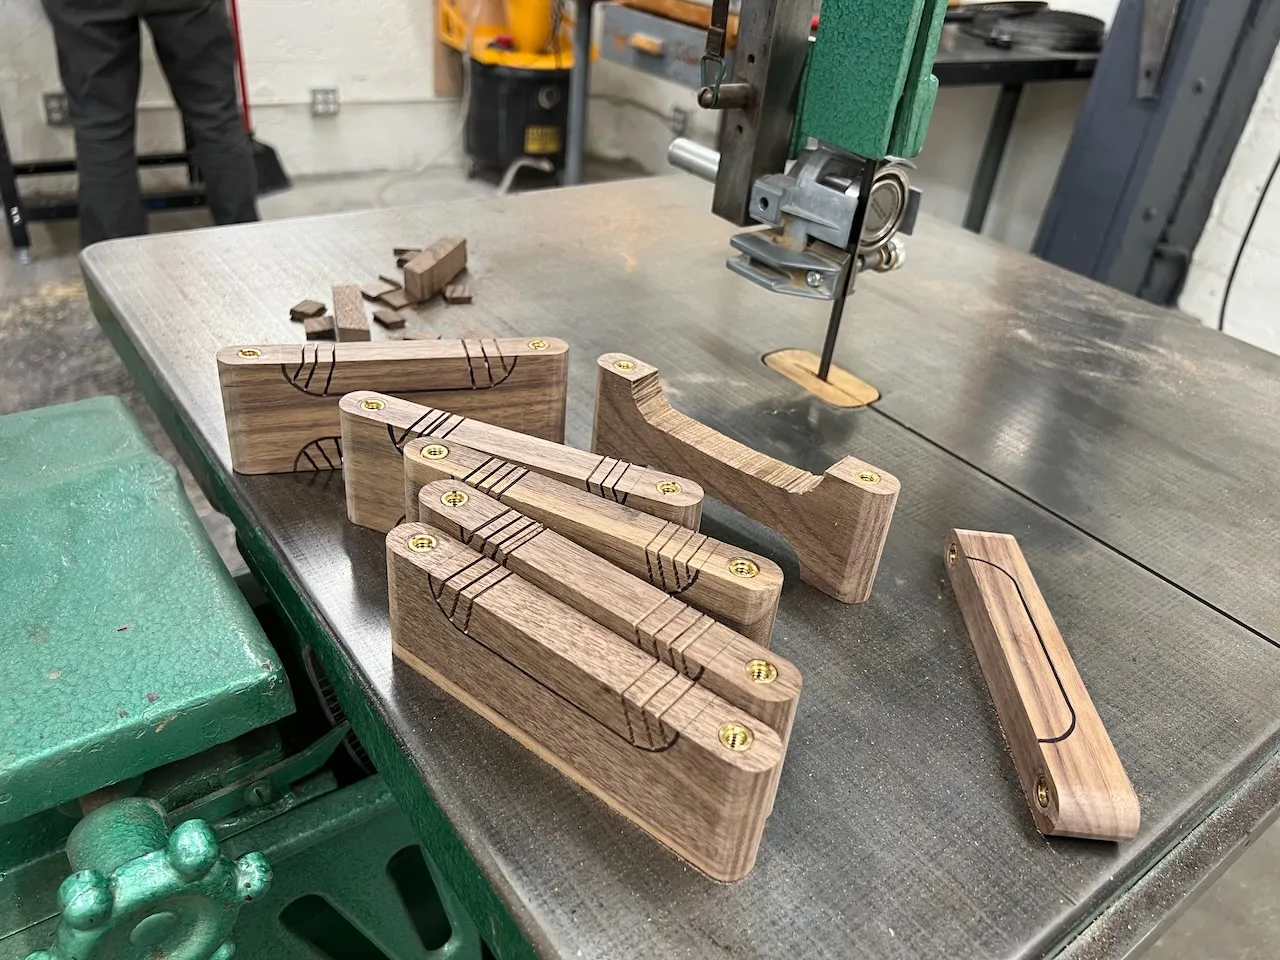
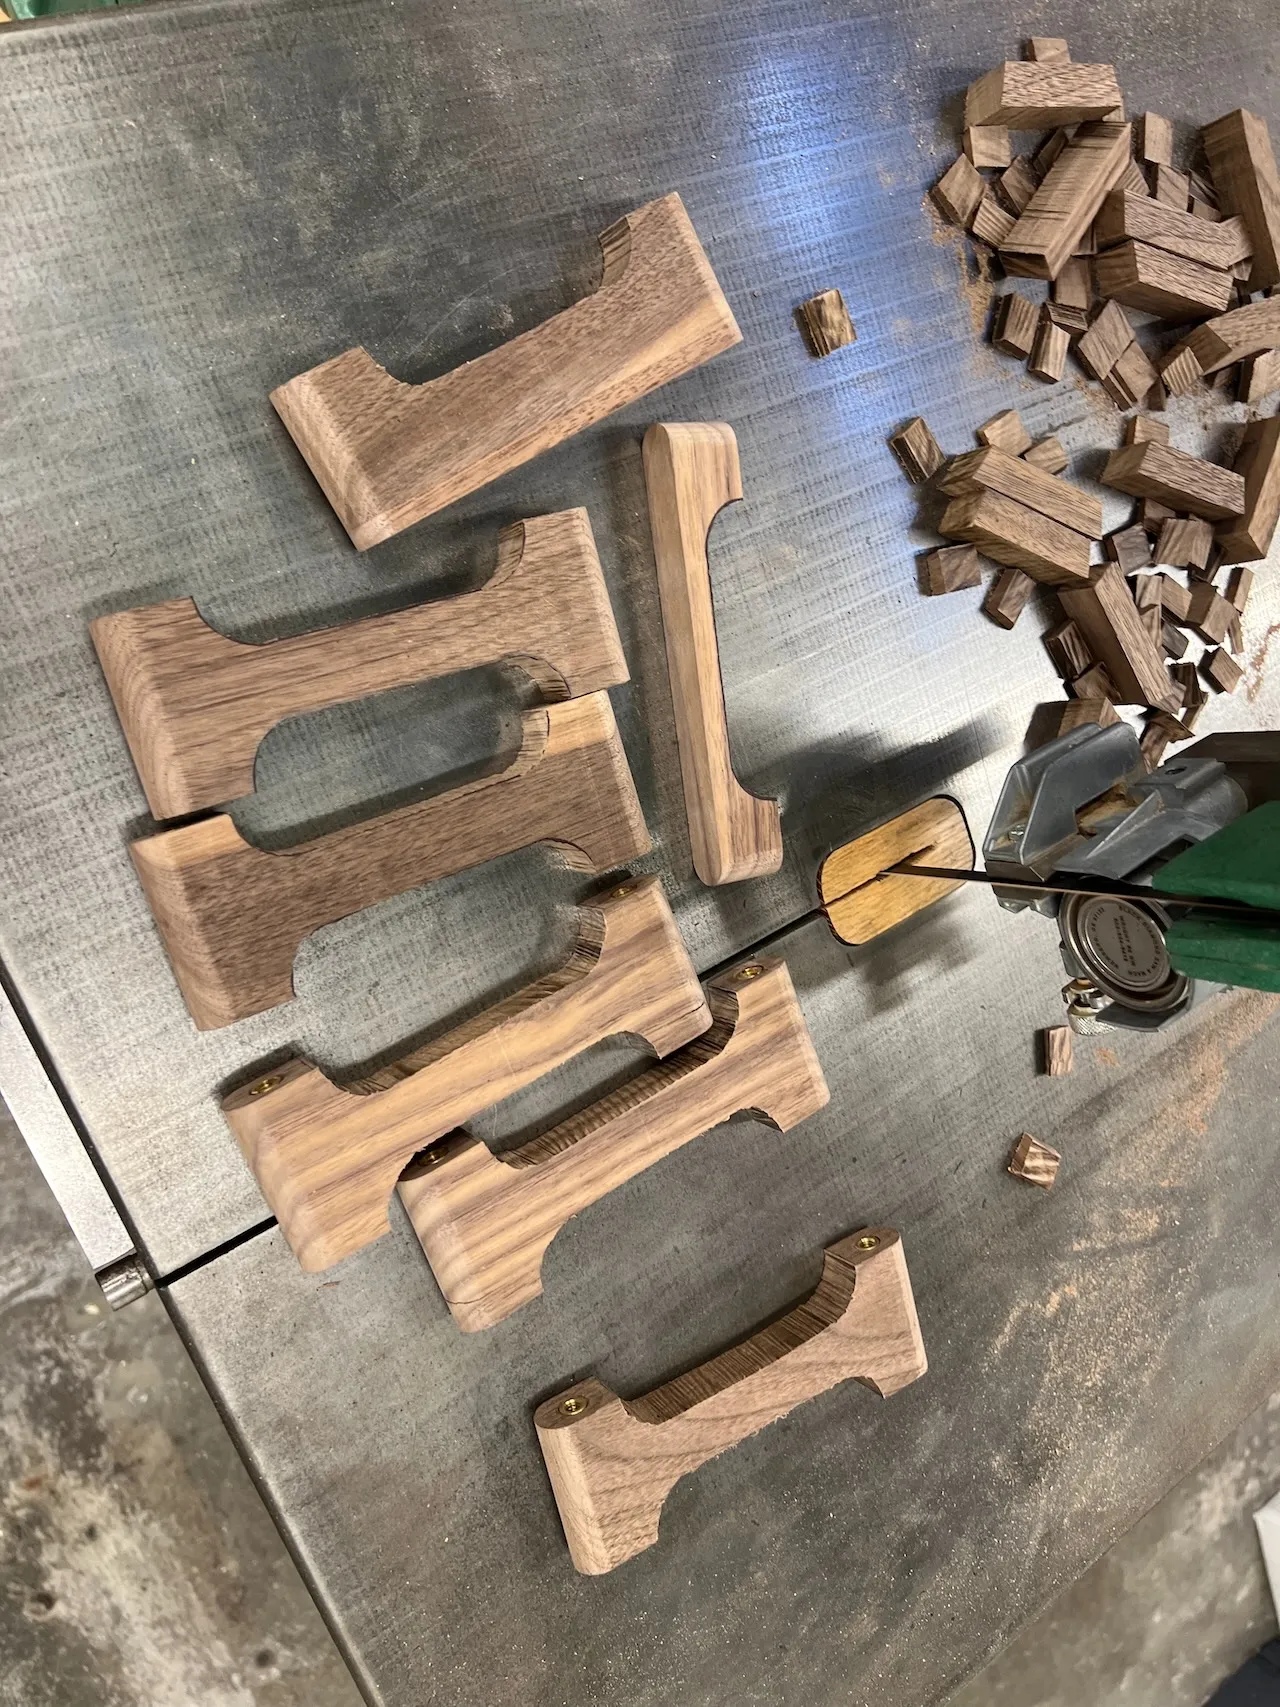
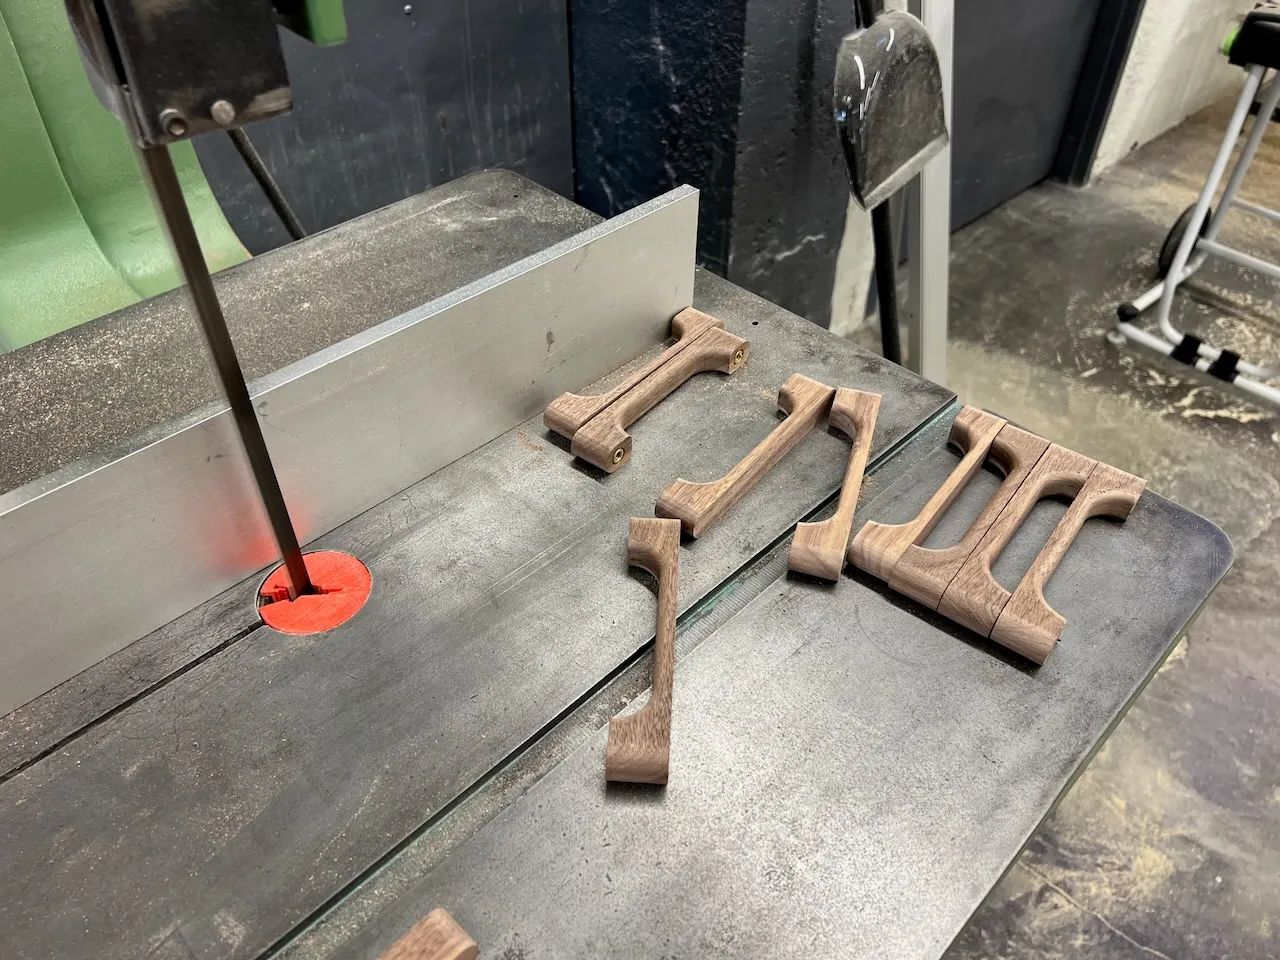
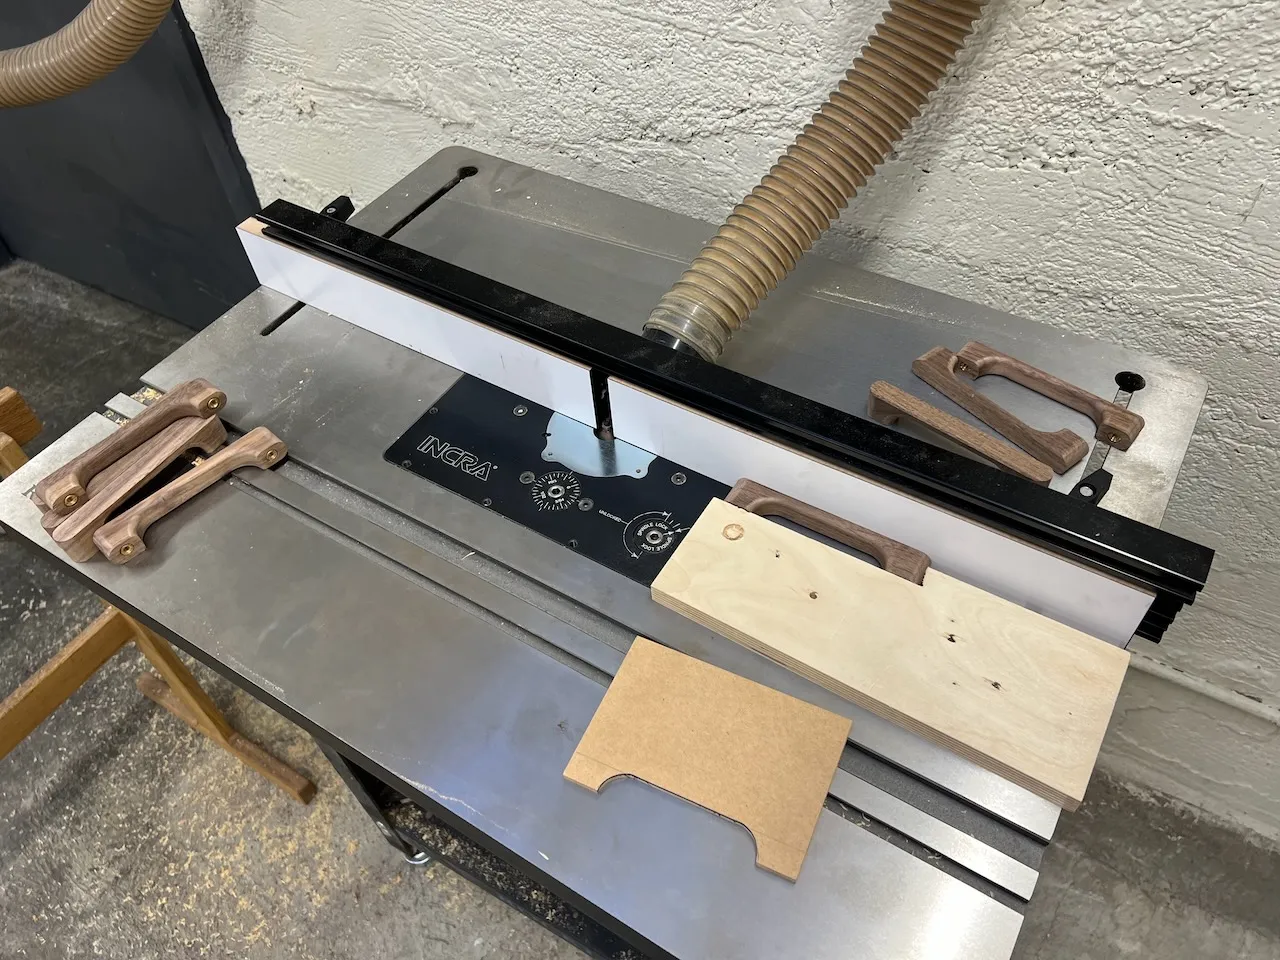
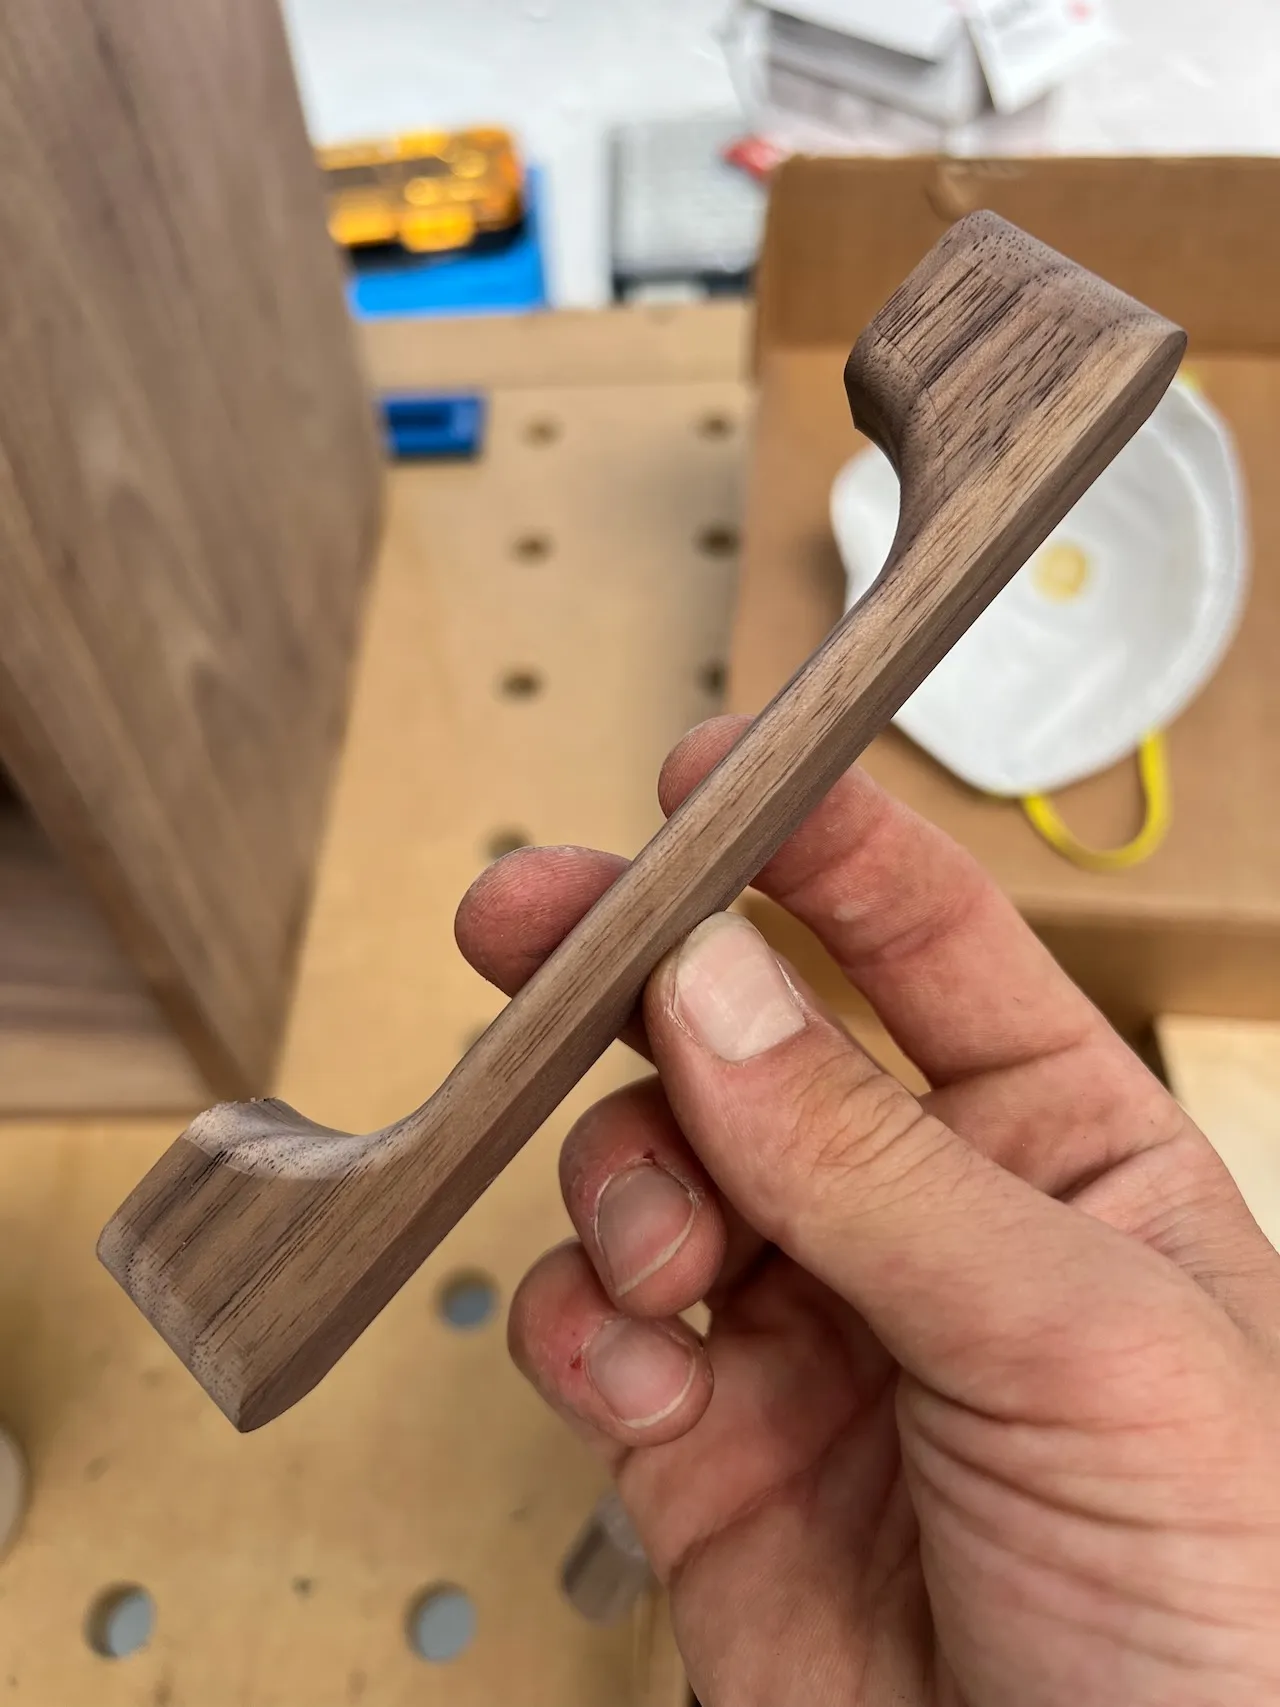
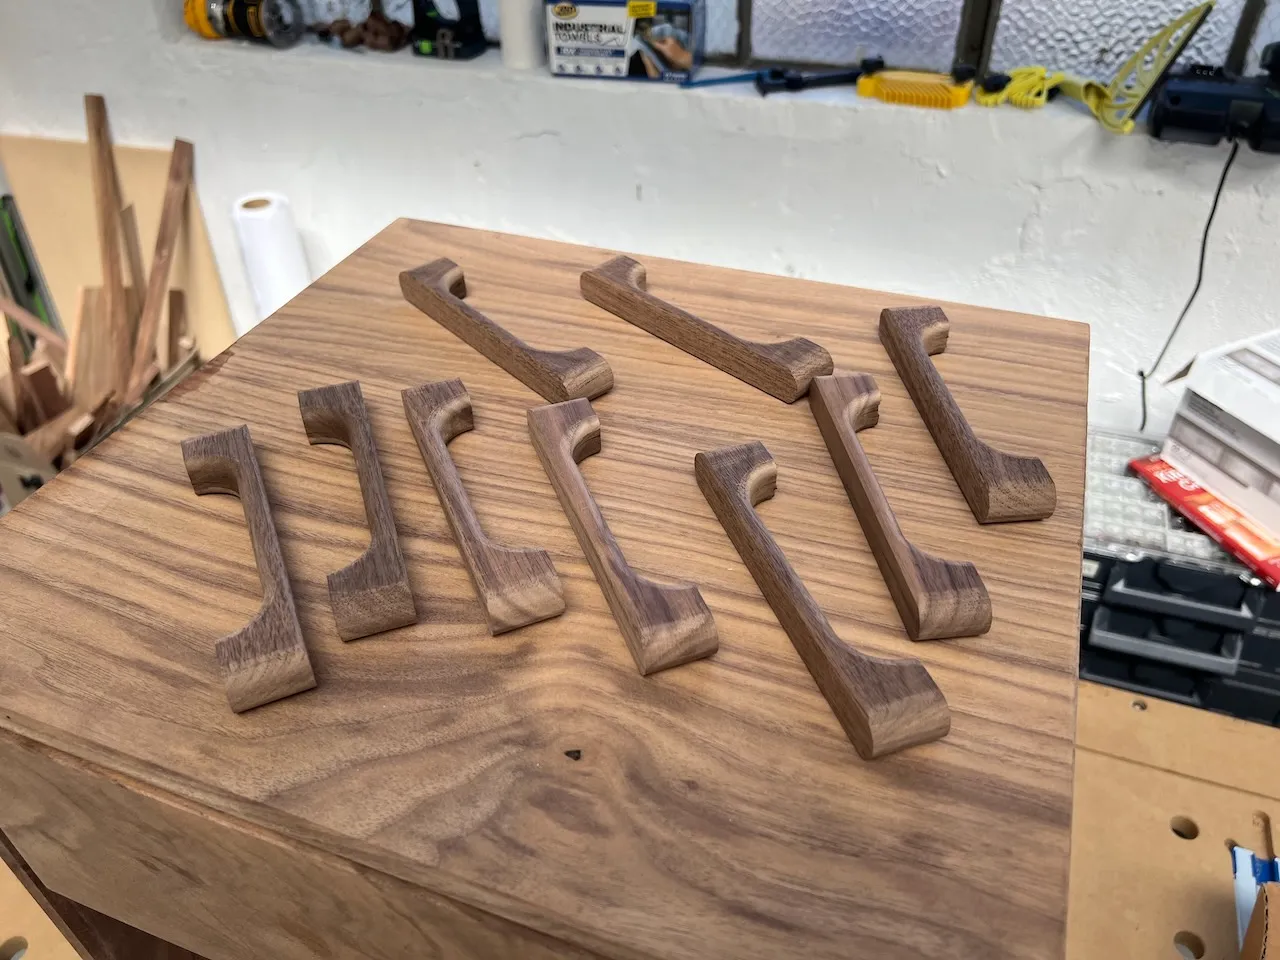
Drawer pull
This was the most fun part of the whole build! I decided to make enough drawer pulls to also be used on my Assembly table for Dan. The one lesson I learned was not to skimp on hole depth for threaded inserts; I cracked a couple in the process before correcting my error.
Final details
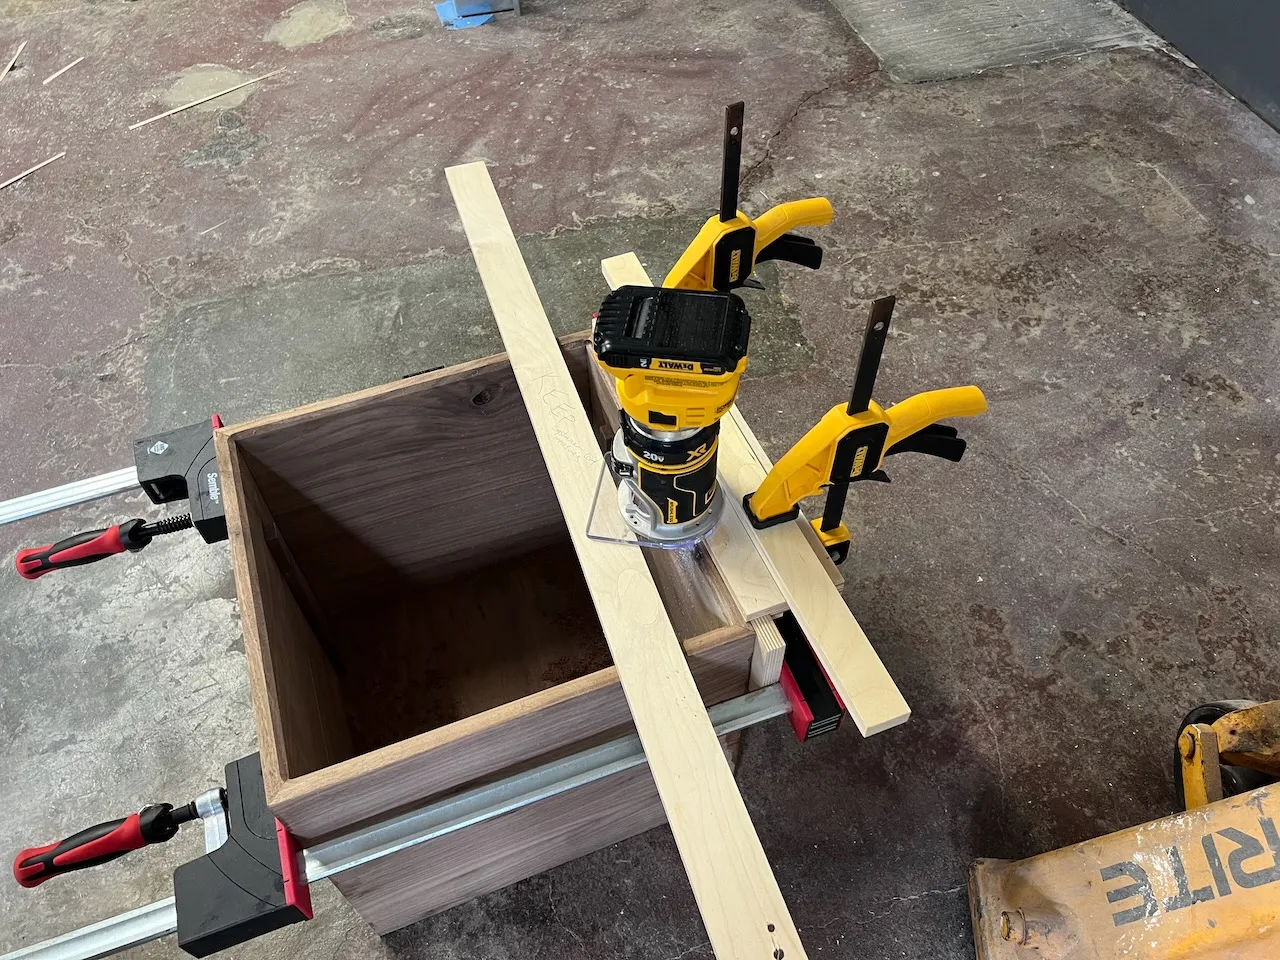
Figure eights for attaching the box to the base, a simple drawer stop, a modified bowl-shaped router profile around the edge, and some final sanding.

Finishing
Simple Finish, 4 coats (ugh). I'm going to try something different next time.
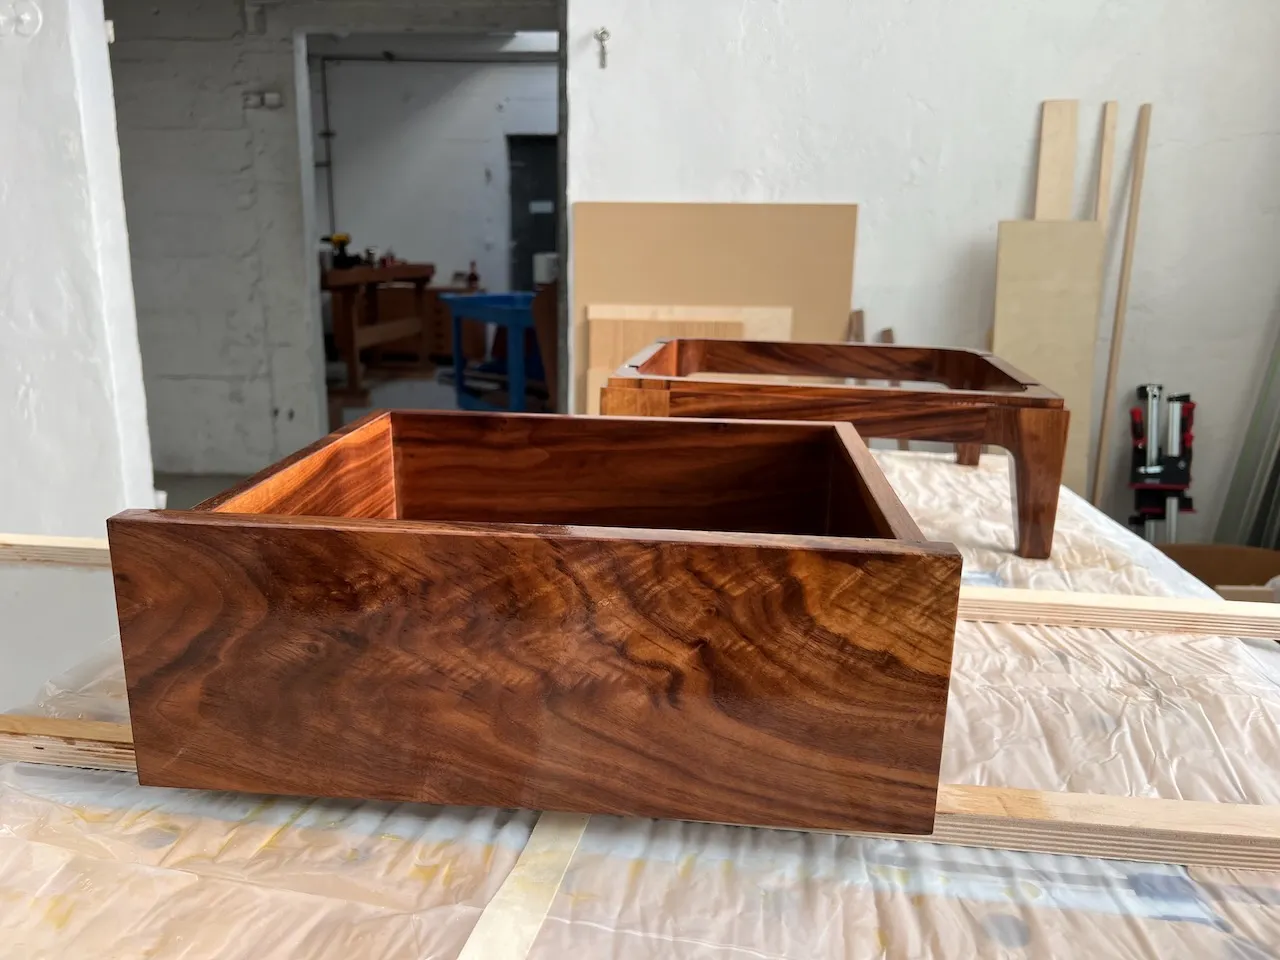
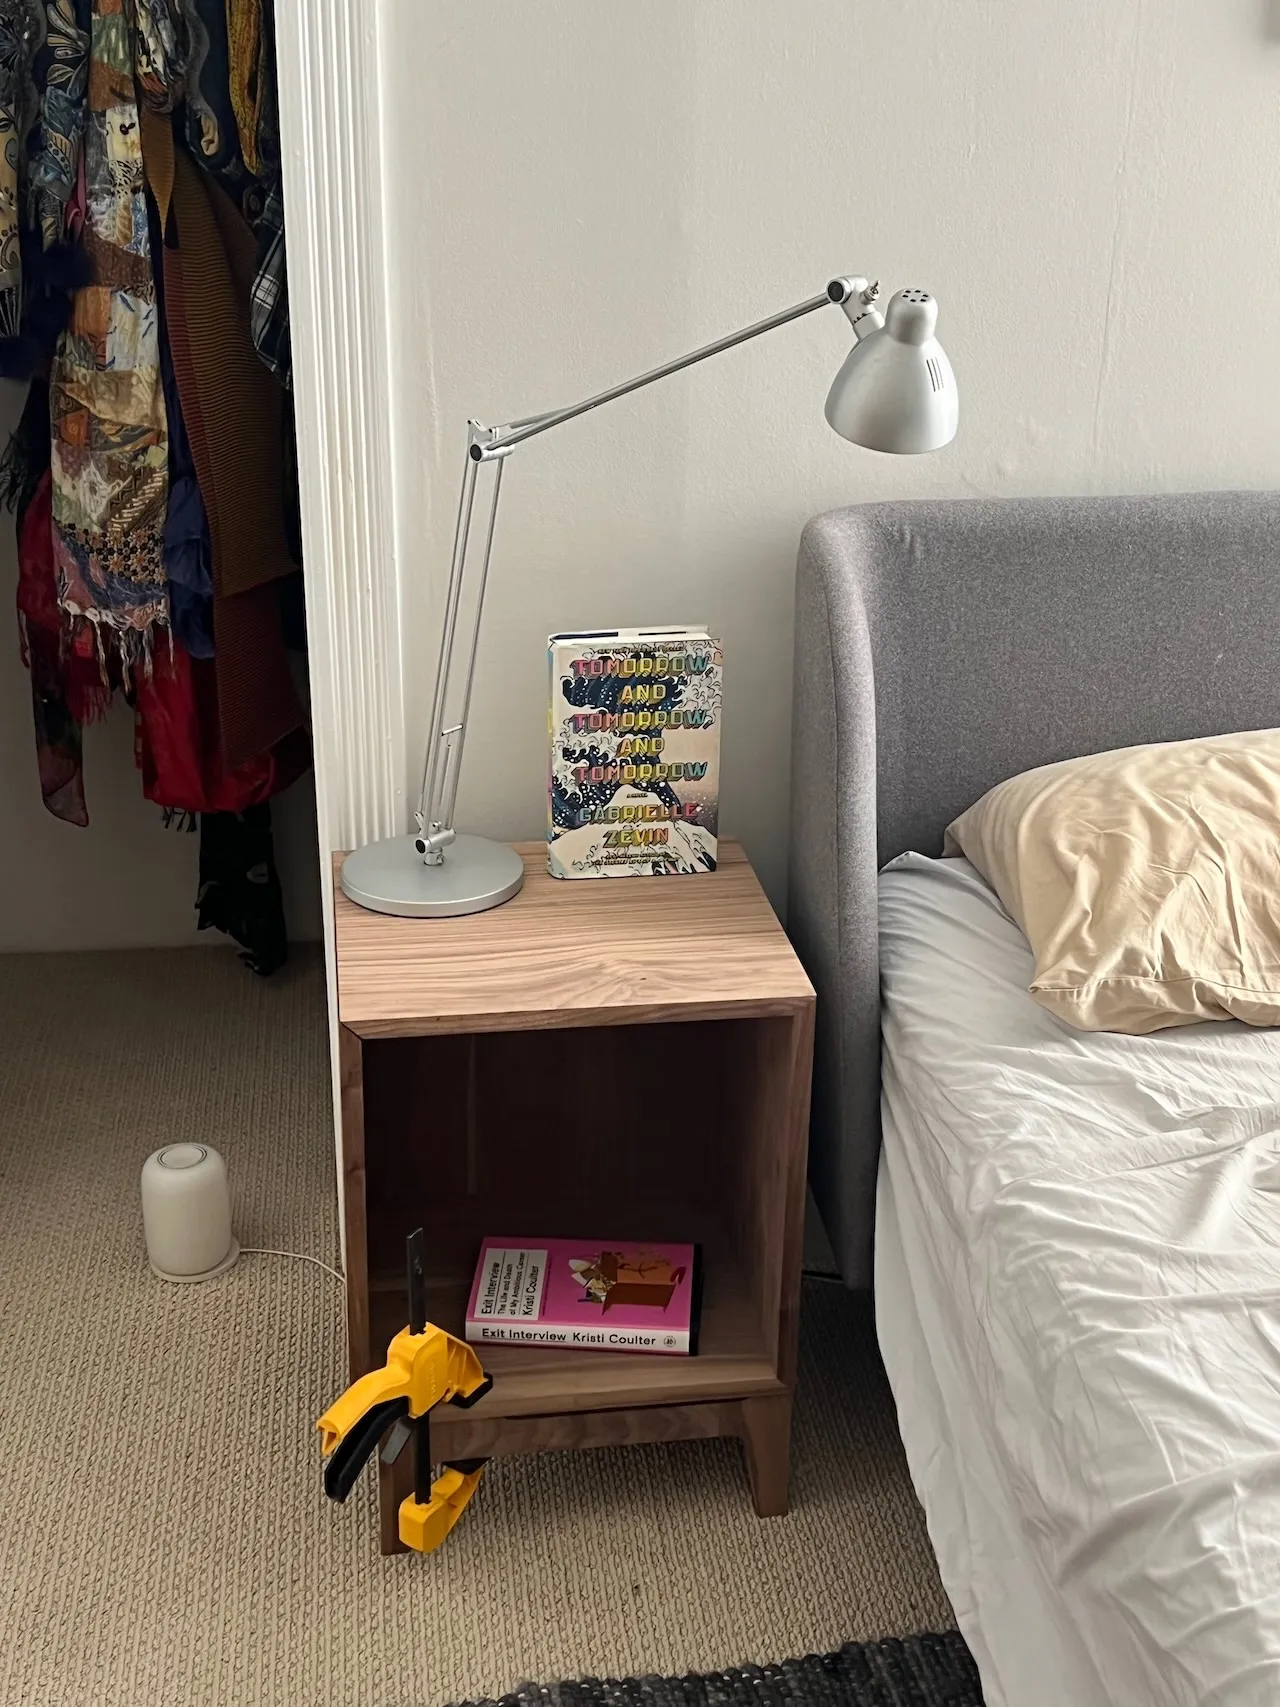
Result
Look at that drawer front figure, like sun rays! I also love the sapwood on the bottom edge and feet, and on the drawer sides. All in all, I'm pretty proud of this plain little box.